
This Swedish Potato Sausage Jerky was based on a favourite holiday treat that my husband enjoyed as a kid. Sure, the ingredients may seem weird for a jerky... but it just WORKS!

This one is not only weird in terms of the theme and ingredients, but in the backstory and conception of the idea, as well.
Over a decade ago, my husband had an unfortunate encounter with a tick in Texas, that left him unable to eat red meat. I quickly set about creating accurate replicas of some of his favourite meat dishes ... and sometimes I had to get creative with it.
As an example, he loved my Tourtiere, so I figured out how to make one using ground chicken and mushrooms to mostly replicate the taste of the missing beef and pork. That’s my Chicken Mushroom Tourtiere - it’s SHOCKINGLY accurate in taste!
Anyway, he grew up in Minnesota, and Swedish Potato Sausage was a big holiday thing for his family... and it’s made with pork.
The result was my Chicken Based Swedish Potato Sausage, which blew his mind. He was shocked that I could so accurately replicate something like that, from one taste, not even being able to use the main ingredient.
Swedish Potato... Jerky
Anyway, when we went on our big “what weird things can we do to jerky?” binge, this sausage came up.
... and the result was actually fantastic. I had my doubts about using mashed potato in jerky, but damn - it was ACCURATE!
That Swedish potato sausage was something he had every year, growing up, so it’s a very comforting taste for him. He says that having it in a jerky format is just a really fun way to enjoy his childhood treat, whenever he wants it.
If you haven’t had Swedish potato sausage, this may seem like a really weird recipe, but it just works.
Anyway, now that you have the backstory, let’s get to the recipe...
Equipment
There are two specialized pieces of equipment that I use for making jerky, beyond basics like spoons, bowls, and measuring cups:
A Food Dehydrator
While you can apparently make homemade ground chicken jerky in a regular home oven, I’m not a fan of running one for hours on end.
I’ve had food dehydrators before - the basic kinds with no time or temperature controls, - and I’d always been too nervous to try making jerky in them. I need more control over - and knowledge of - the drying process, when meat is concerned.
I’ve since upgraded to a Cosori 6 Tray Food Dehydrator, and LOVE it.
It was only like $200 Canadian, and it’s paid for itself MANY times over, between all the Maple Cinnamon Apple Chips and jerkies I’ve been making!
Think of it this way - The same size of jerky that I tend to make goes for about $4 in a gas station. (Really, more for anything specialty, like chicken jerky!)
I get about 10-15 strips out of a batch (varying by recipe) - let’s average that out to 12. That’s $48 worth of jerky, for $8 or less. Make 5 batches, that’s your $200 in savings!
Anyway, we’re using a dehydrator a LOT more, now that we have a nice one. Having the control over the temperature really opens up the possibilities.
A Jerky Gun
Also known as a “jerky cannon”, this is basically a food grade caulking gun that you use to pipe out strips of jerky onto your parchment paper.
Mine is the XINQIAO Jerky Gun Food Grade Plastic Beef Jerky Gun Kit . Regular $35 (Canadian) on Amazon, but it had a coupon for something like 25% off, when I purchased it.
Worth every penny, even if I’d paid full price!
I’ve heard of people making jerky by spreading the mixture out, flattening it with a rolling pin, then cutting it with a pizza cutter, but to be honest, that sounds fussy.
The very first time I used my jerk gun, I was HOOKED. I had no idea that the jerky making process could be so quick and easy!
I’ve never been one for single-function, special equipment in the kitchen... but I LOVE it.
Ingredients
With only 2 exceptions, the ingredients in this Swedish Potato Sausage jerky recipe are super simple - you probably even have them on hand!
As for those last two, they may be specialty, but I use them in pretty much all of my jerky recipes. They’ll definitely get used, if you’re a jerky fan!
Some notes for you:
Lean Ground Chicken
Use the highest quality ground chicken you can when making chicken jerky.
While fresh or frozen will usually work in my jerky recipes, I recommend using fresh in this one, just due to the amount of liquid ingredients we’re adding.
Thawed, previously-frozen ground chicken can end up a bit more “watery”, and dry down to a thinner jerky than fresh ground chicken does, in my experience... and that’s before adding all of the hot sauce!
Lean chicken breast meat will have a better shelf life than higher fat dark meat will - fat can go rancid.
Finally, if you want to make turkey jerky, feel free to use the same amount of lean ground turkey. For that matter, you can swap the meat our for whatever kind of ground meat you prefer!
As a note: This recipe was specifically designed to NOT use red meat. The use of mushrooms is to help replicate the more umami taste of pork, when using poultry.
If you’re looking to use ground pork - to be more authentic to the source material, you can skip the mushrooms entirely.
Keep in mind, though - more fat = shorter shelf life. The use of chicken here ends up being dual purpose!
Fresh Produce
This Swedish Potato Sausage Jerky uses a bit of fresh produce to help replicate the flavour of the sausage.
First, you’ll need ½ cup of finely chopped onion. I prefer to use yellow onion, but a white onion will work just fine as well.
Secondly, you’ll need 3 oz of Crimini mushrooms, AKA Baby Bella mushrooms. This goes a LONG way to replicating the taste of the OG sausage, even though there’s no mushroom in it!
You can use white button mushrooms, it just won’t taste quite as “meaty” as the crimini mushrooms.
Mashed Potatoes
For the best results - and longest shelf life - you’ll want to use plain potatoes. Skip the butter, milk, sour cream, and anything else you might add - just use plain potatoes, mashed up.
When I’m feeling lazy, I’ll just pick up a plain mashed potato from Wendy’s, and use that!
Liquid Smoke
As with all of my jerkies, you’ll need some Liquid Smoke - a little goes a lot way!
I only use a small amount in this ground chicken jerky recipe, to give it a traditional “jerky” flavour - it’s not at all overpowering, just an accent.
Prague Powder
Prague Powder is one of a few different curing salts out on the market. It’s not something you’ll normally cook with, but it’ll last a long time - a little goes a long way!
I use Prague Powder #1 Cure, same as I use for my Montreal Smoked Meat Recipe, Back Bacon Recipe, Homemade Corned Beef Recipe, and Peameal Bacon Recipe.
This is a bright pink curing salt that’s a mixture of salt and sodium nitrite. It’s commonly used in cured meats - like pepperoni or summer sausages - and is what gives the jerky its characteristic red colour.
Beyond aesthetics, it also contributes to giving dehydrated meat that iconic jerky flavor, AND helps ensure that your homemade meat snack will be good to eat for a long time. It does this by preventing the growth of bacteria, during and after the drying process.
A couple of things to note:
1. Prague Powder is pink, but it is NOT the same thing as Himalayan pink salt!
2. Prague cure is only to be used in small amounts for curing meats, and should never be consumed as-is. The measurements are important - if you want a saltier XX chicken jerky, add some regular salt, rather than increasing the curing salt.
Everything Else
Rounding out this recipe, you will need:
Ground Black Pepper
Allspice
Nutmeg
Salt
... as always, I don’t really have anything to add, when it comes to these last few ingredients!
Share the Love!If you’ve made one of our recipes, be sure to take some pics of your handiwork! If you post it to Bluesky, be sure to tag us - @CelebrationGen. We're also on Pinterest, so you can save all your favourite recipes to a board! Also, be sure to subscribe to our free email newsletter, so you never miss out on any of our nonsense. Well, the published nonsense, anyway! |
How to Make Swedish Potato Sausage Chicken Jerky
The full recipe is in the printable recipe card at the end of this post, here is the pictorial walk through:
Cut 2 or 3 squares of parchment paper slightly smaller than your dehydrator trays, set aside.
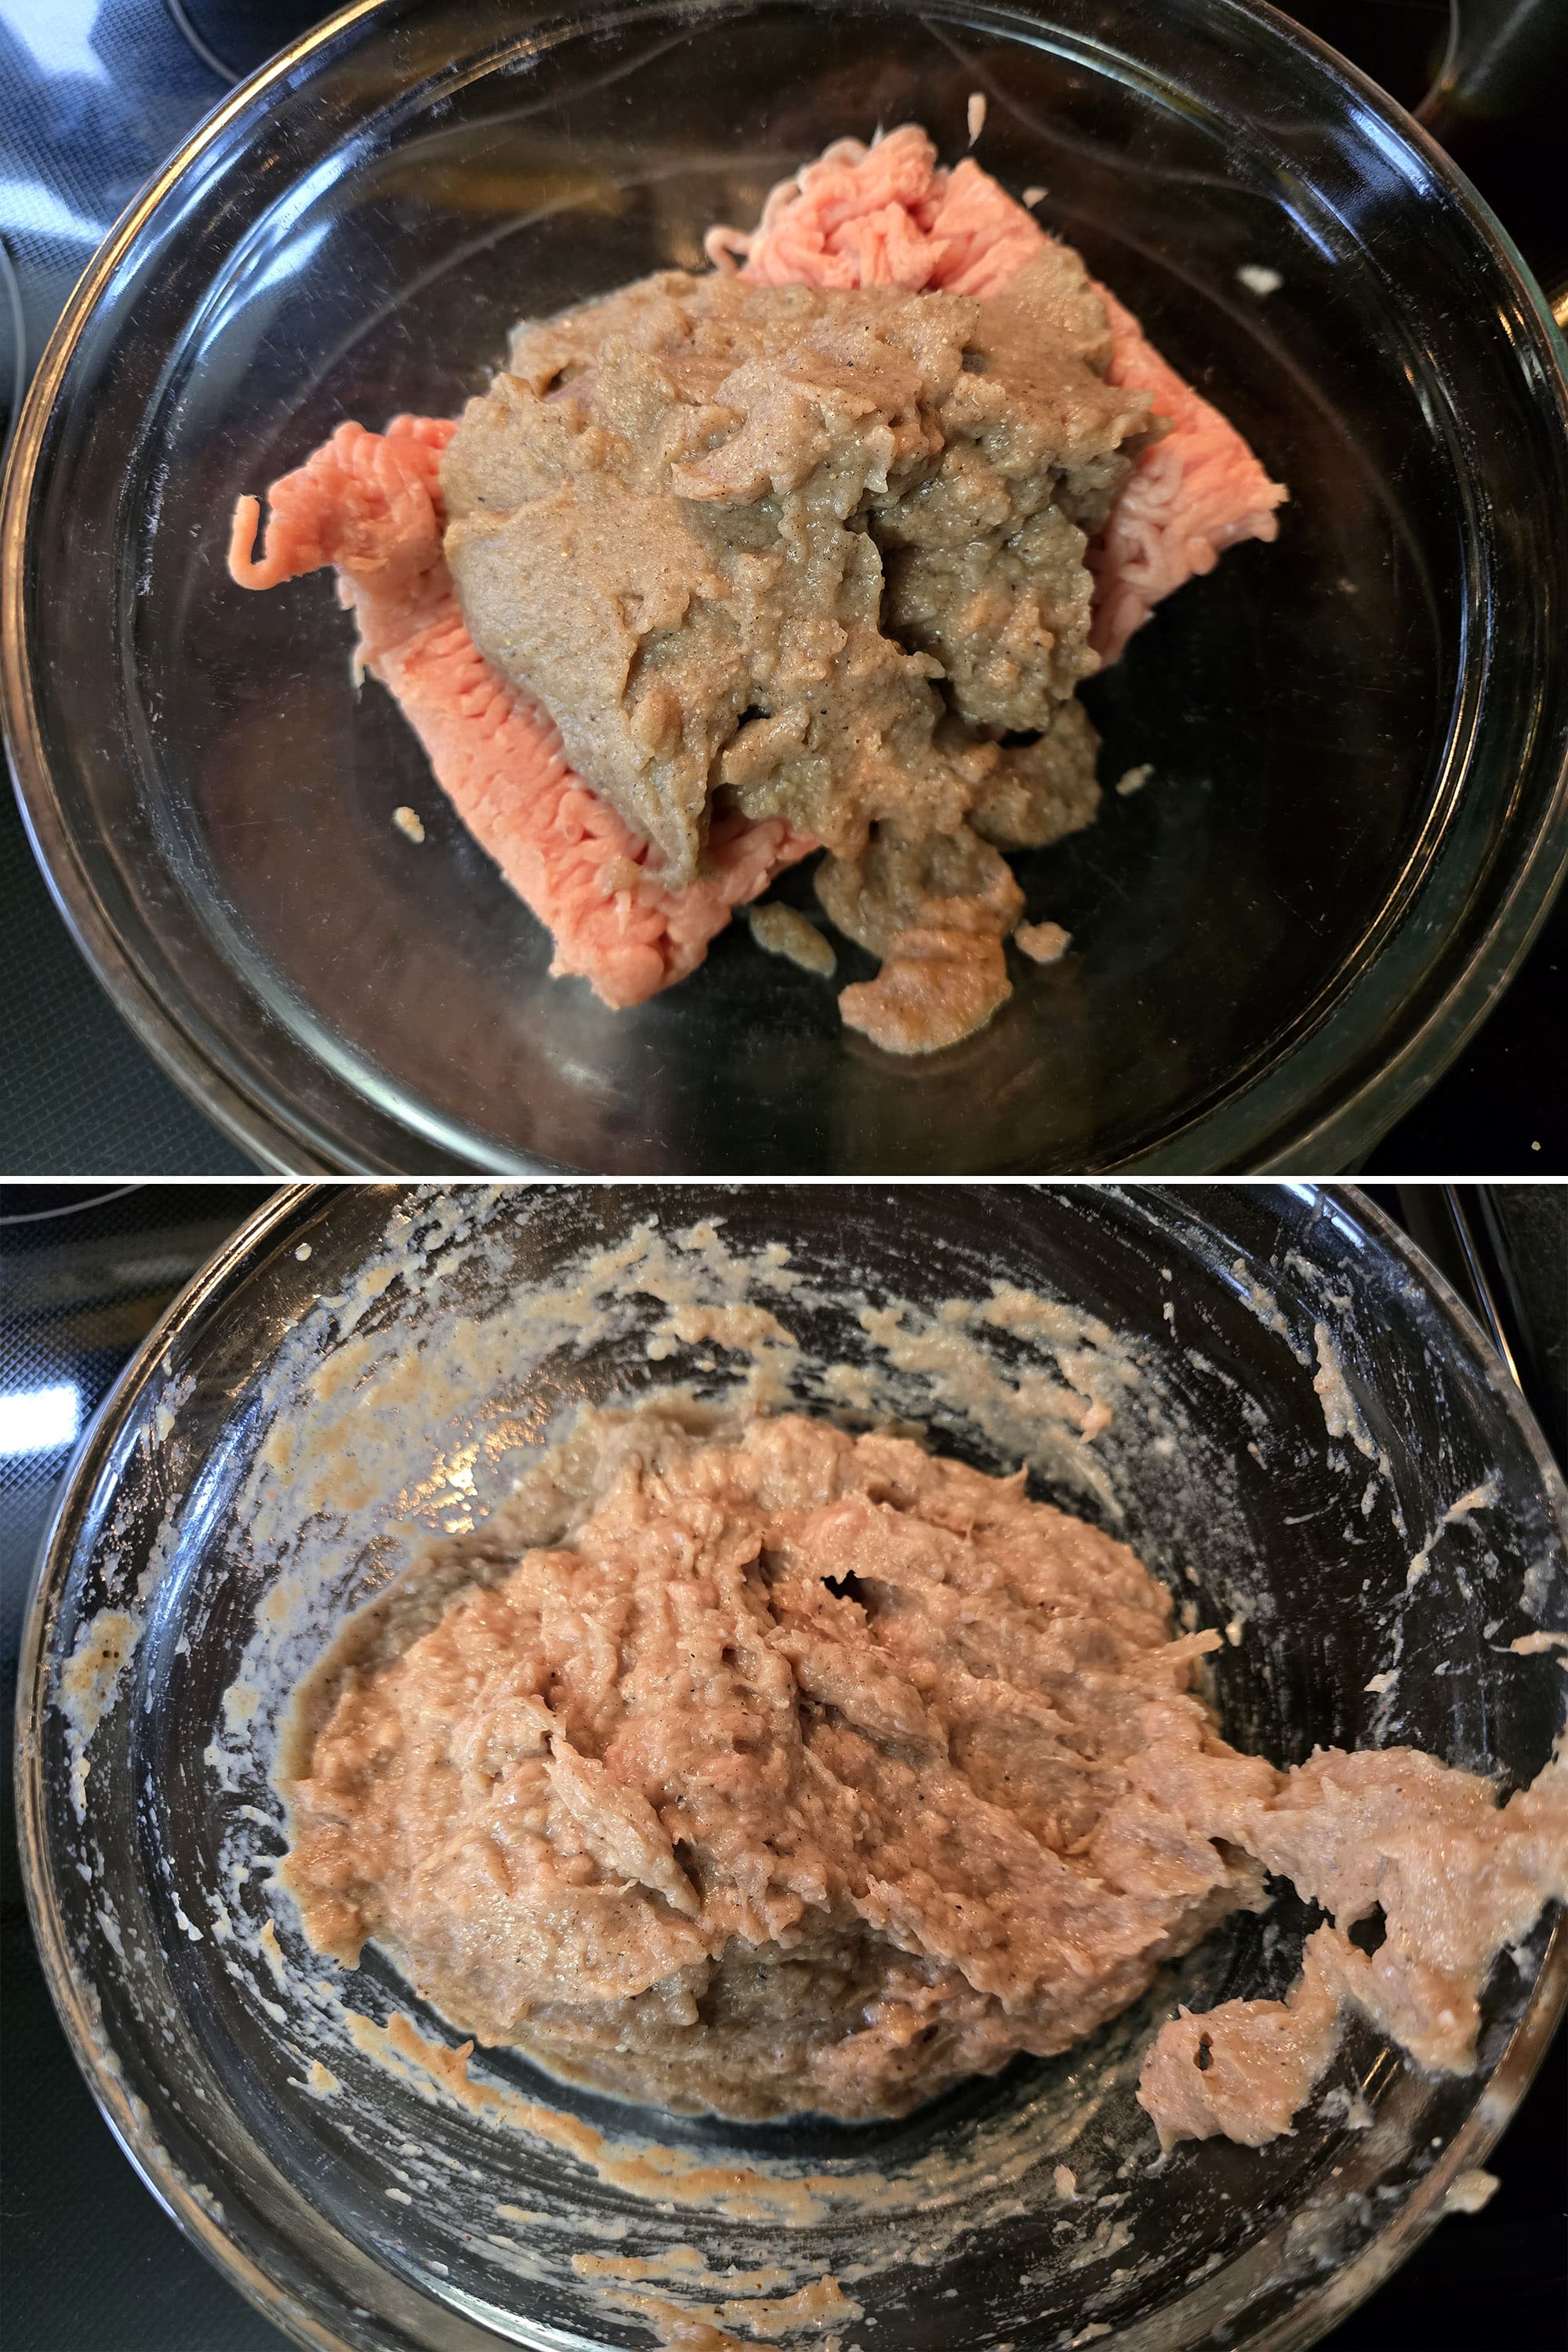
In a small food processor, combine onions and mushrooms, blitz until very finely chopped. Add remaining ingredients - except for the chicken - and blitz until smooth.
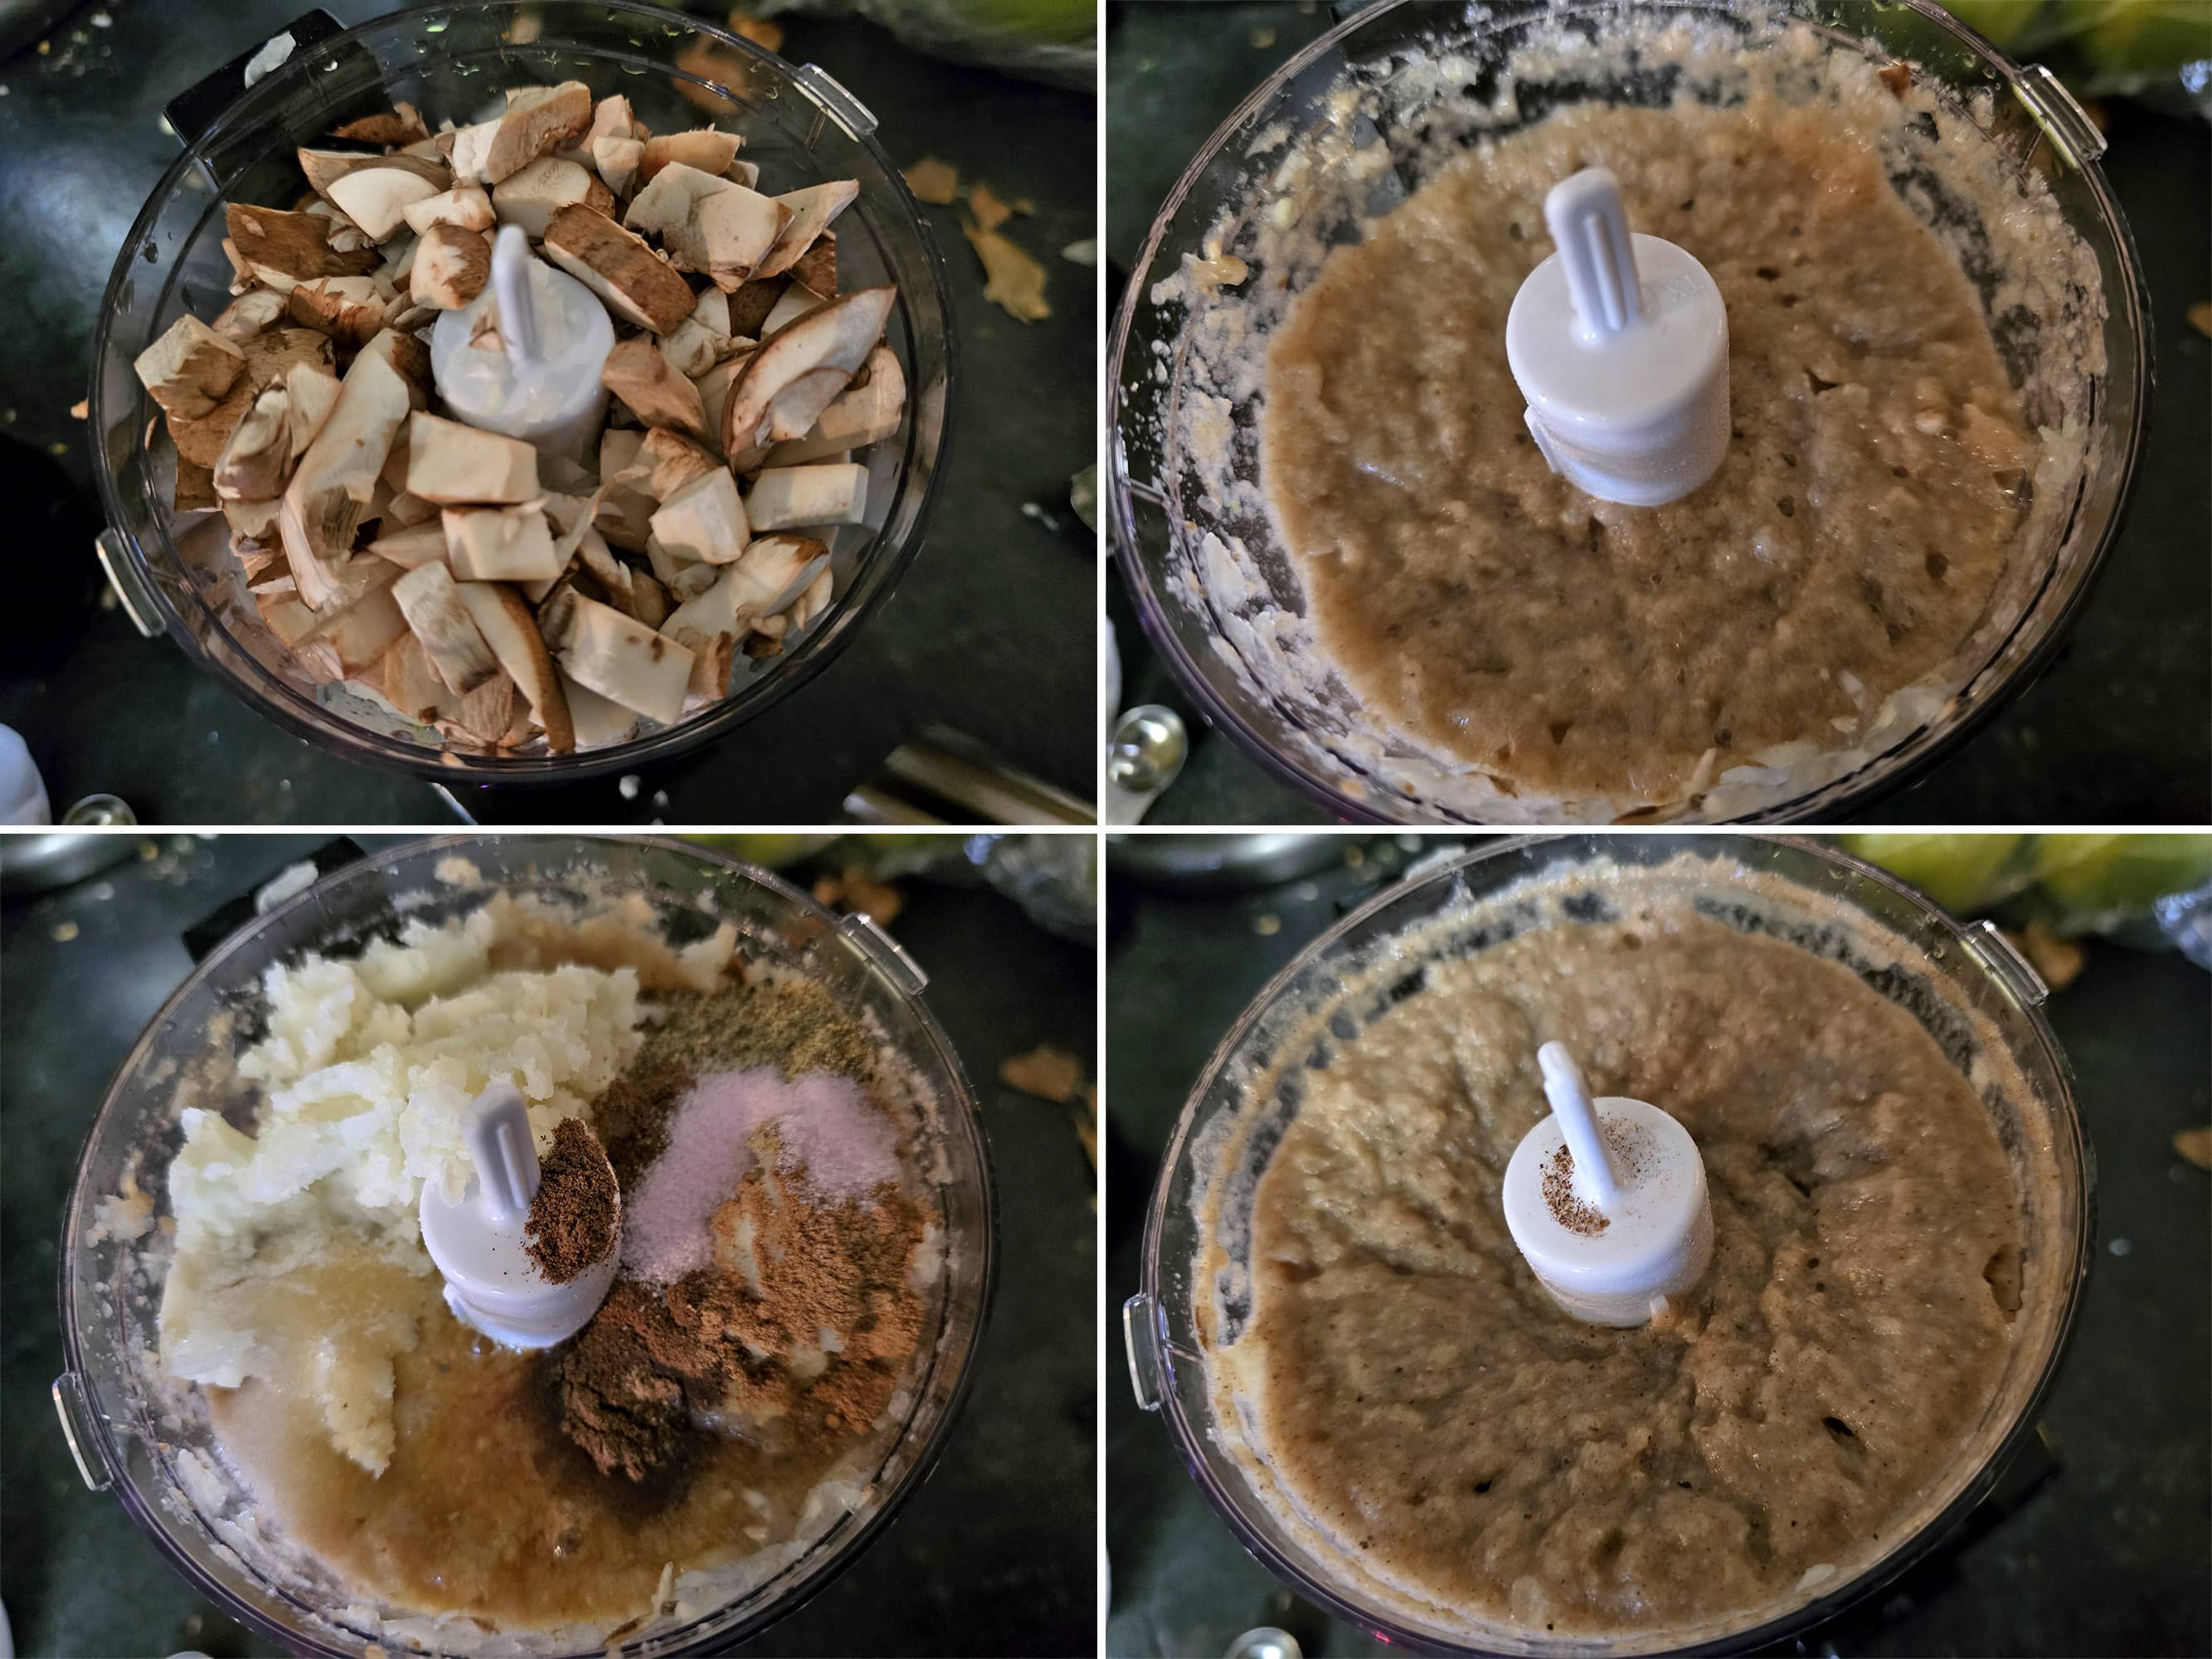
Mix it REALLY well - for best results, it’s better to overhandle it, than to under-mix it.
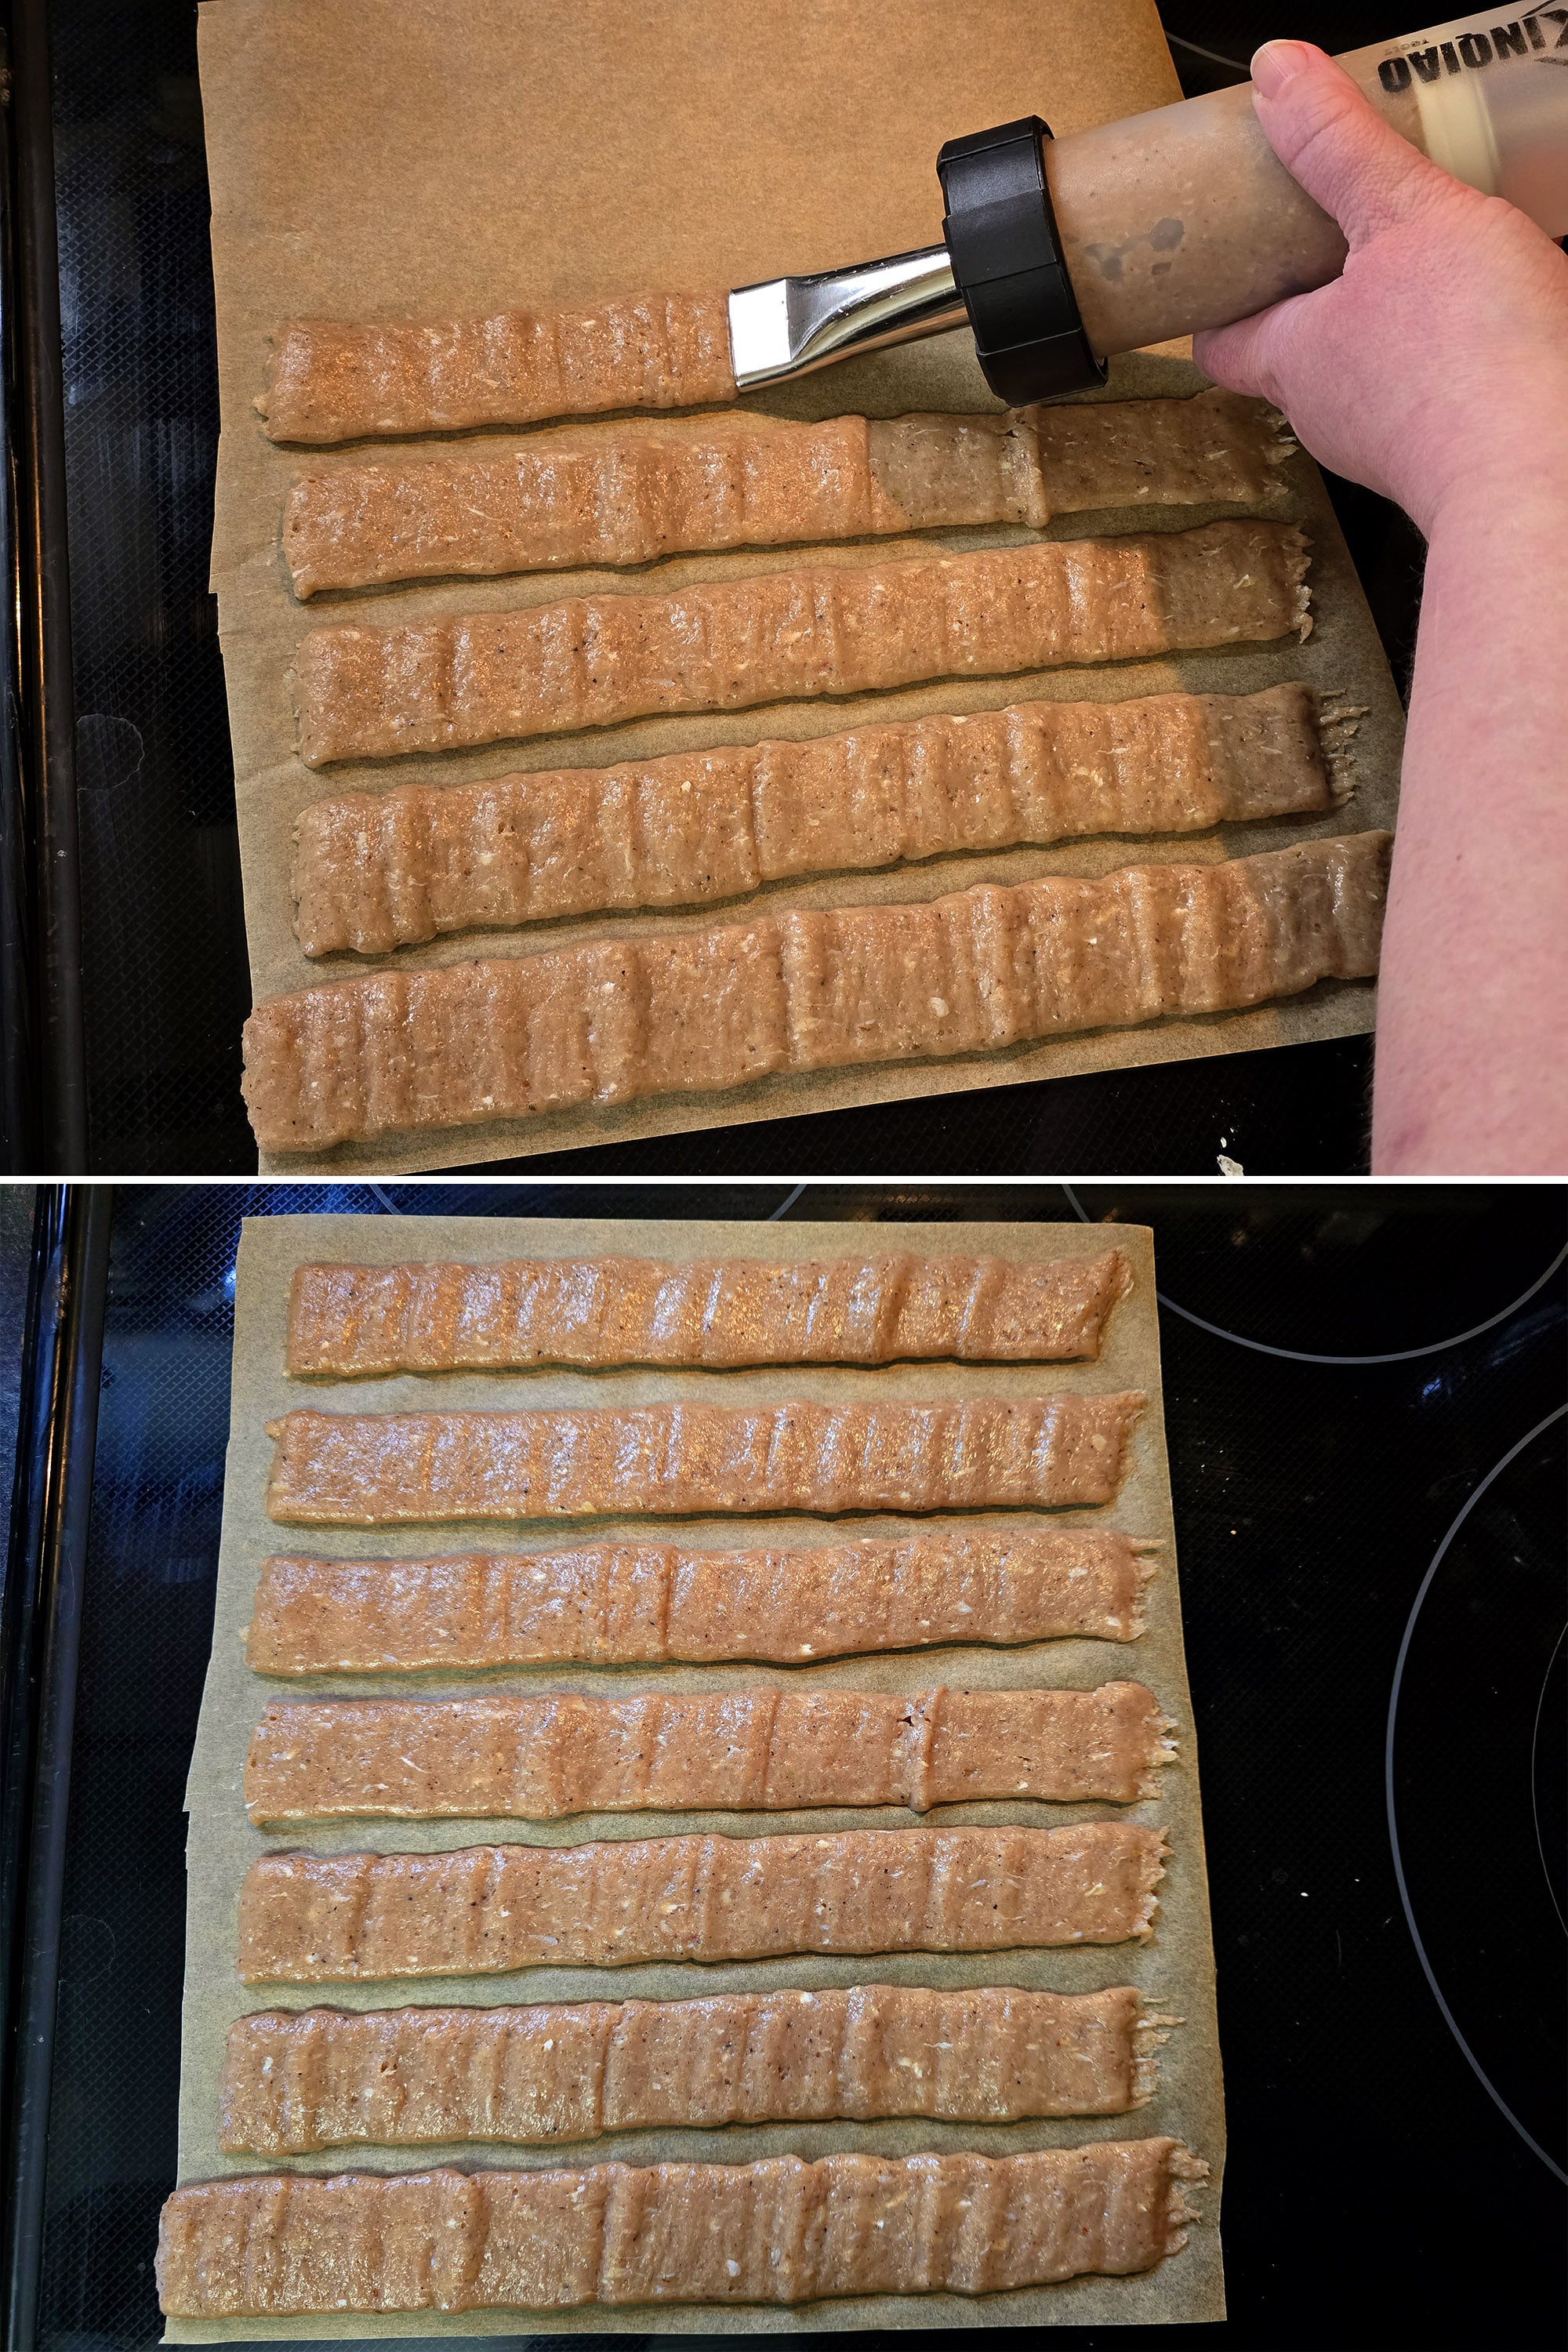
Line your dehydrator racks with the cut parchment paper, then pipe your jerky strips out onto them, leaving some space in between each.
Dehydrate in a food dehydrator at 165 F for 2 hours.

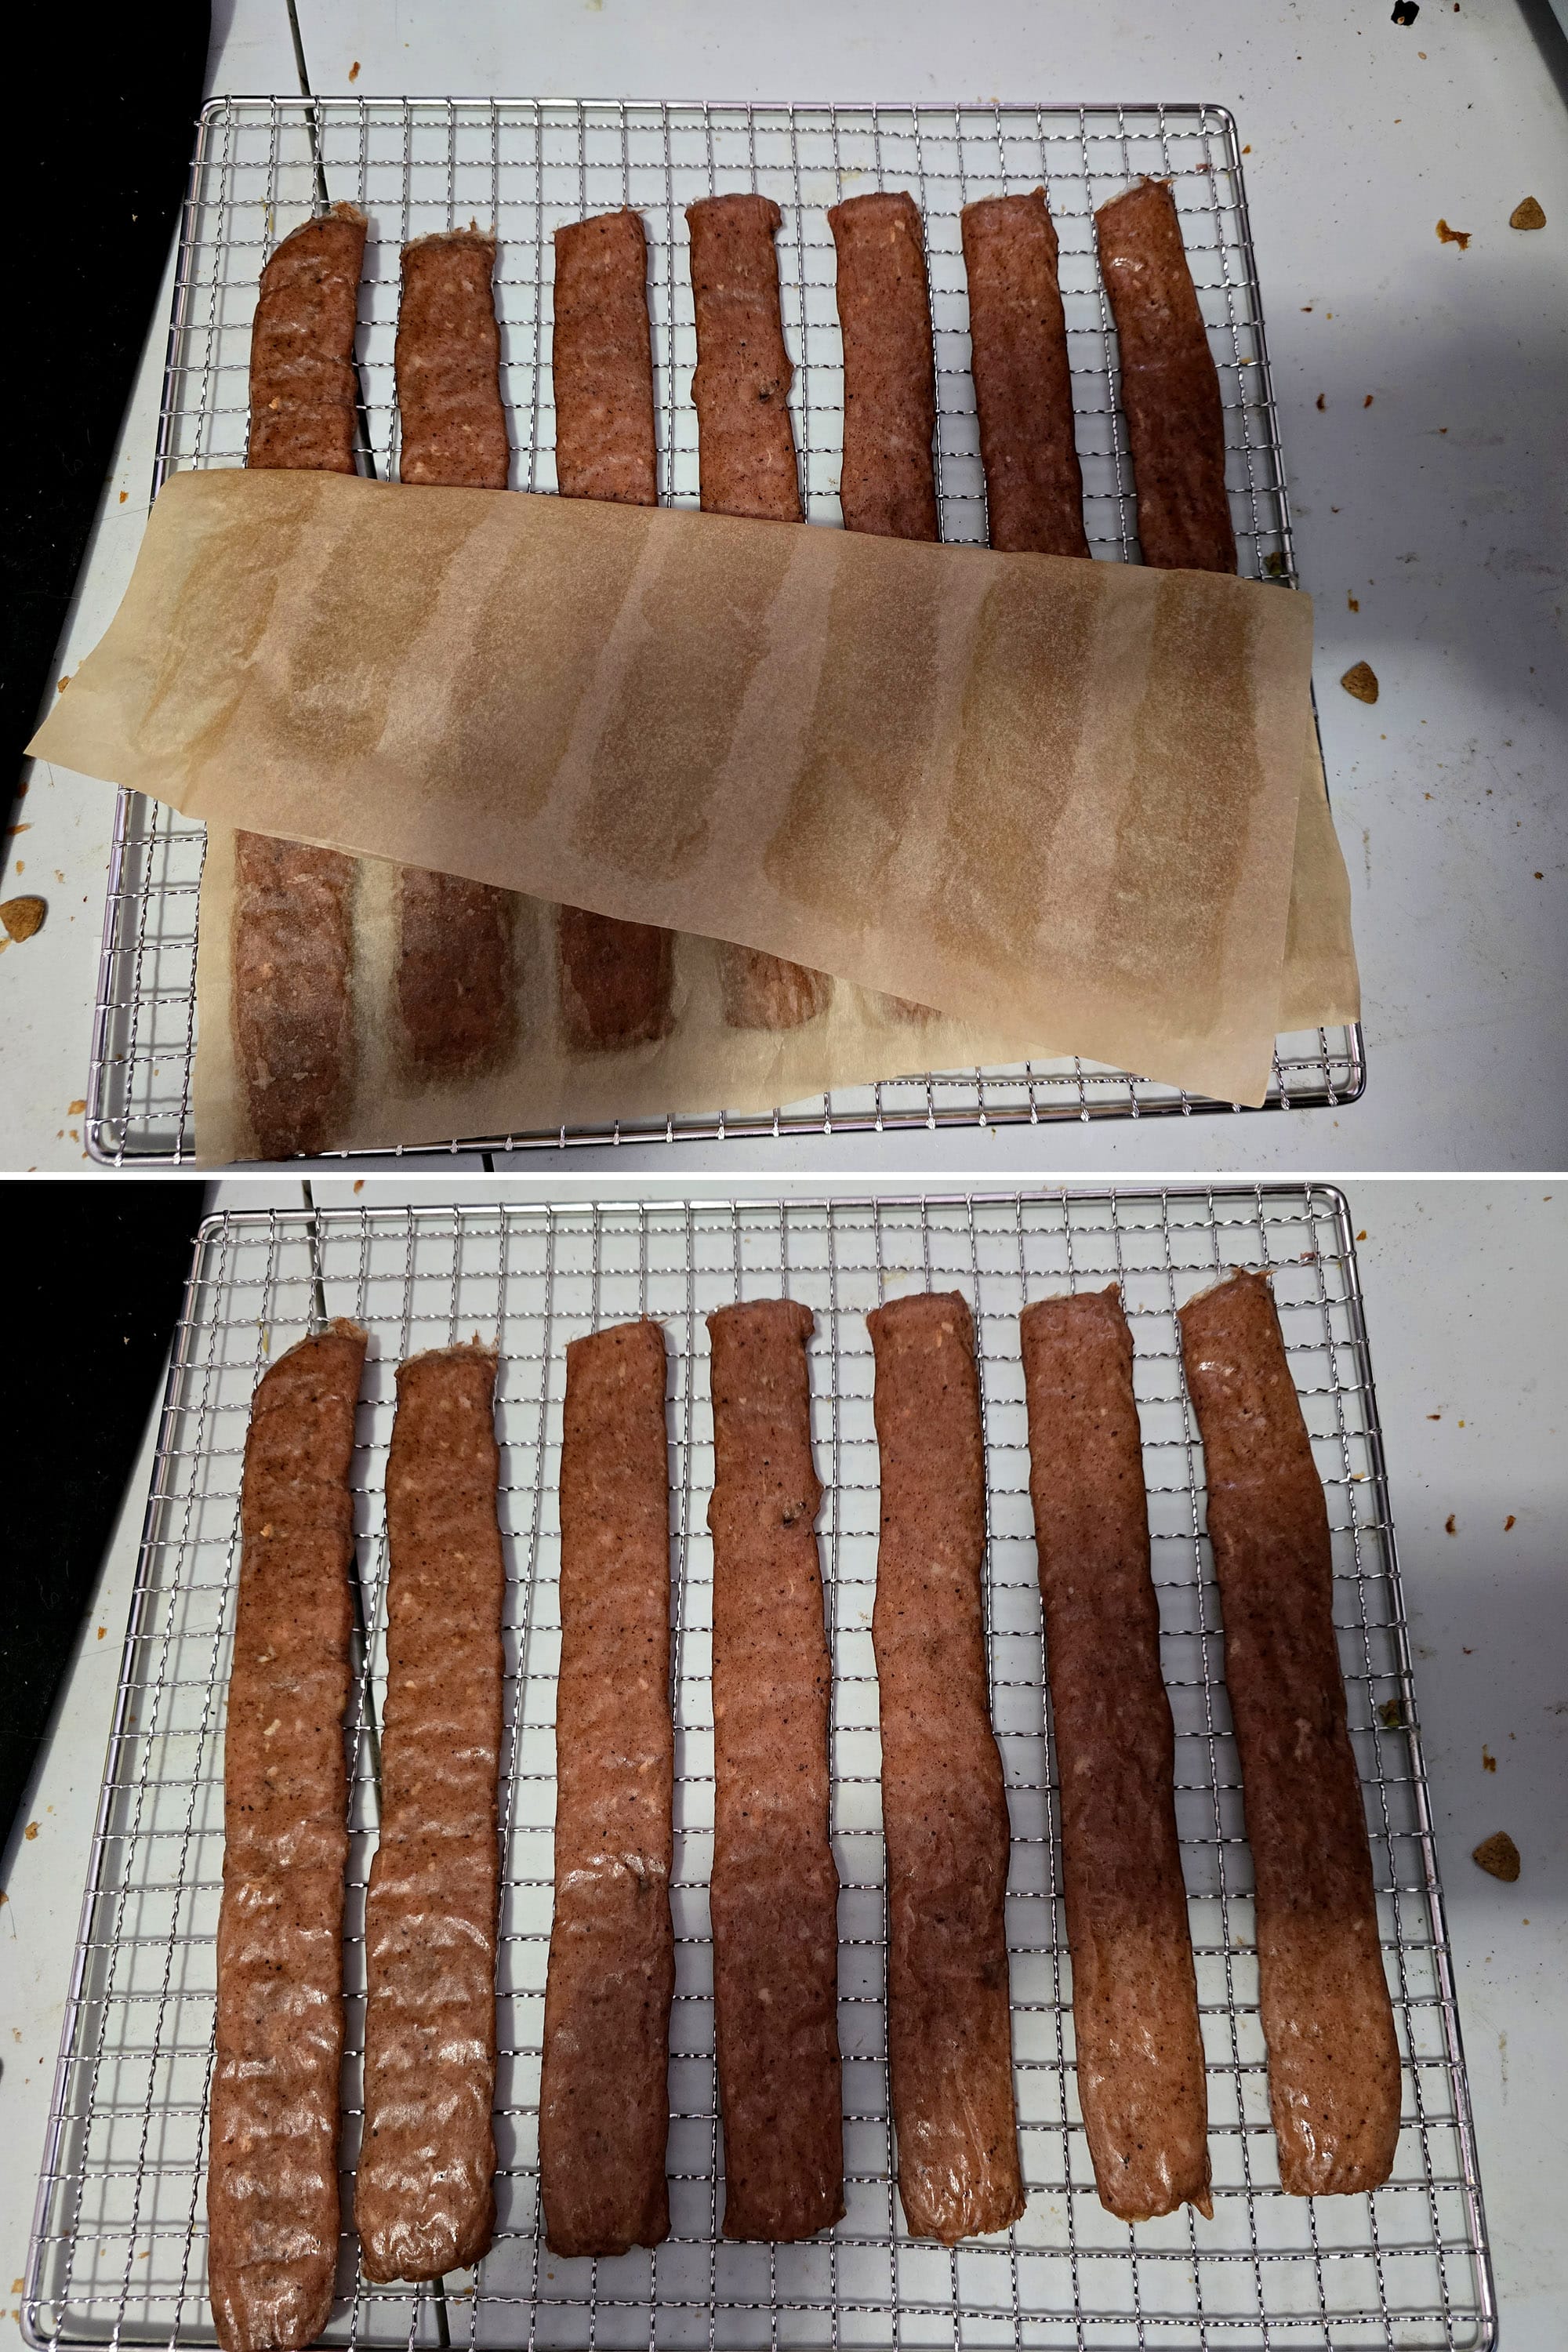
Before and after the first round of drying.
Once two hours has passed, remove the jerky strips from the parchment, flip them over, and place them directly onto the wire rack.
To test for doneness, remove a piece of Swedish Potato Sausage jerky from the dehydrator and let it cool to room temperature. It should feel dry to the touch and be able to bend to 90 degrees without breaking. (A bit of cracking or crackling is ok!)

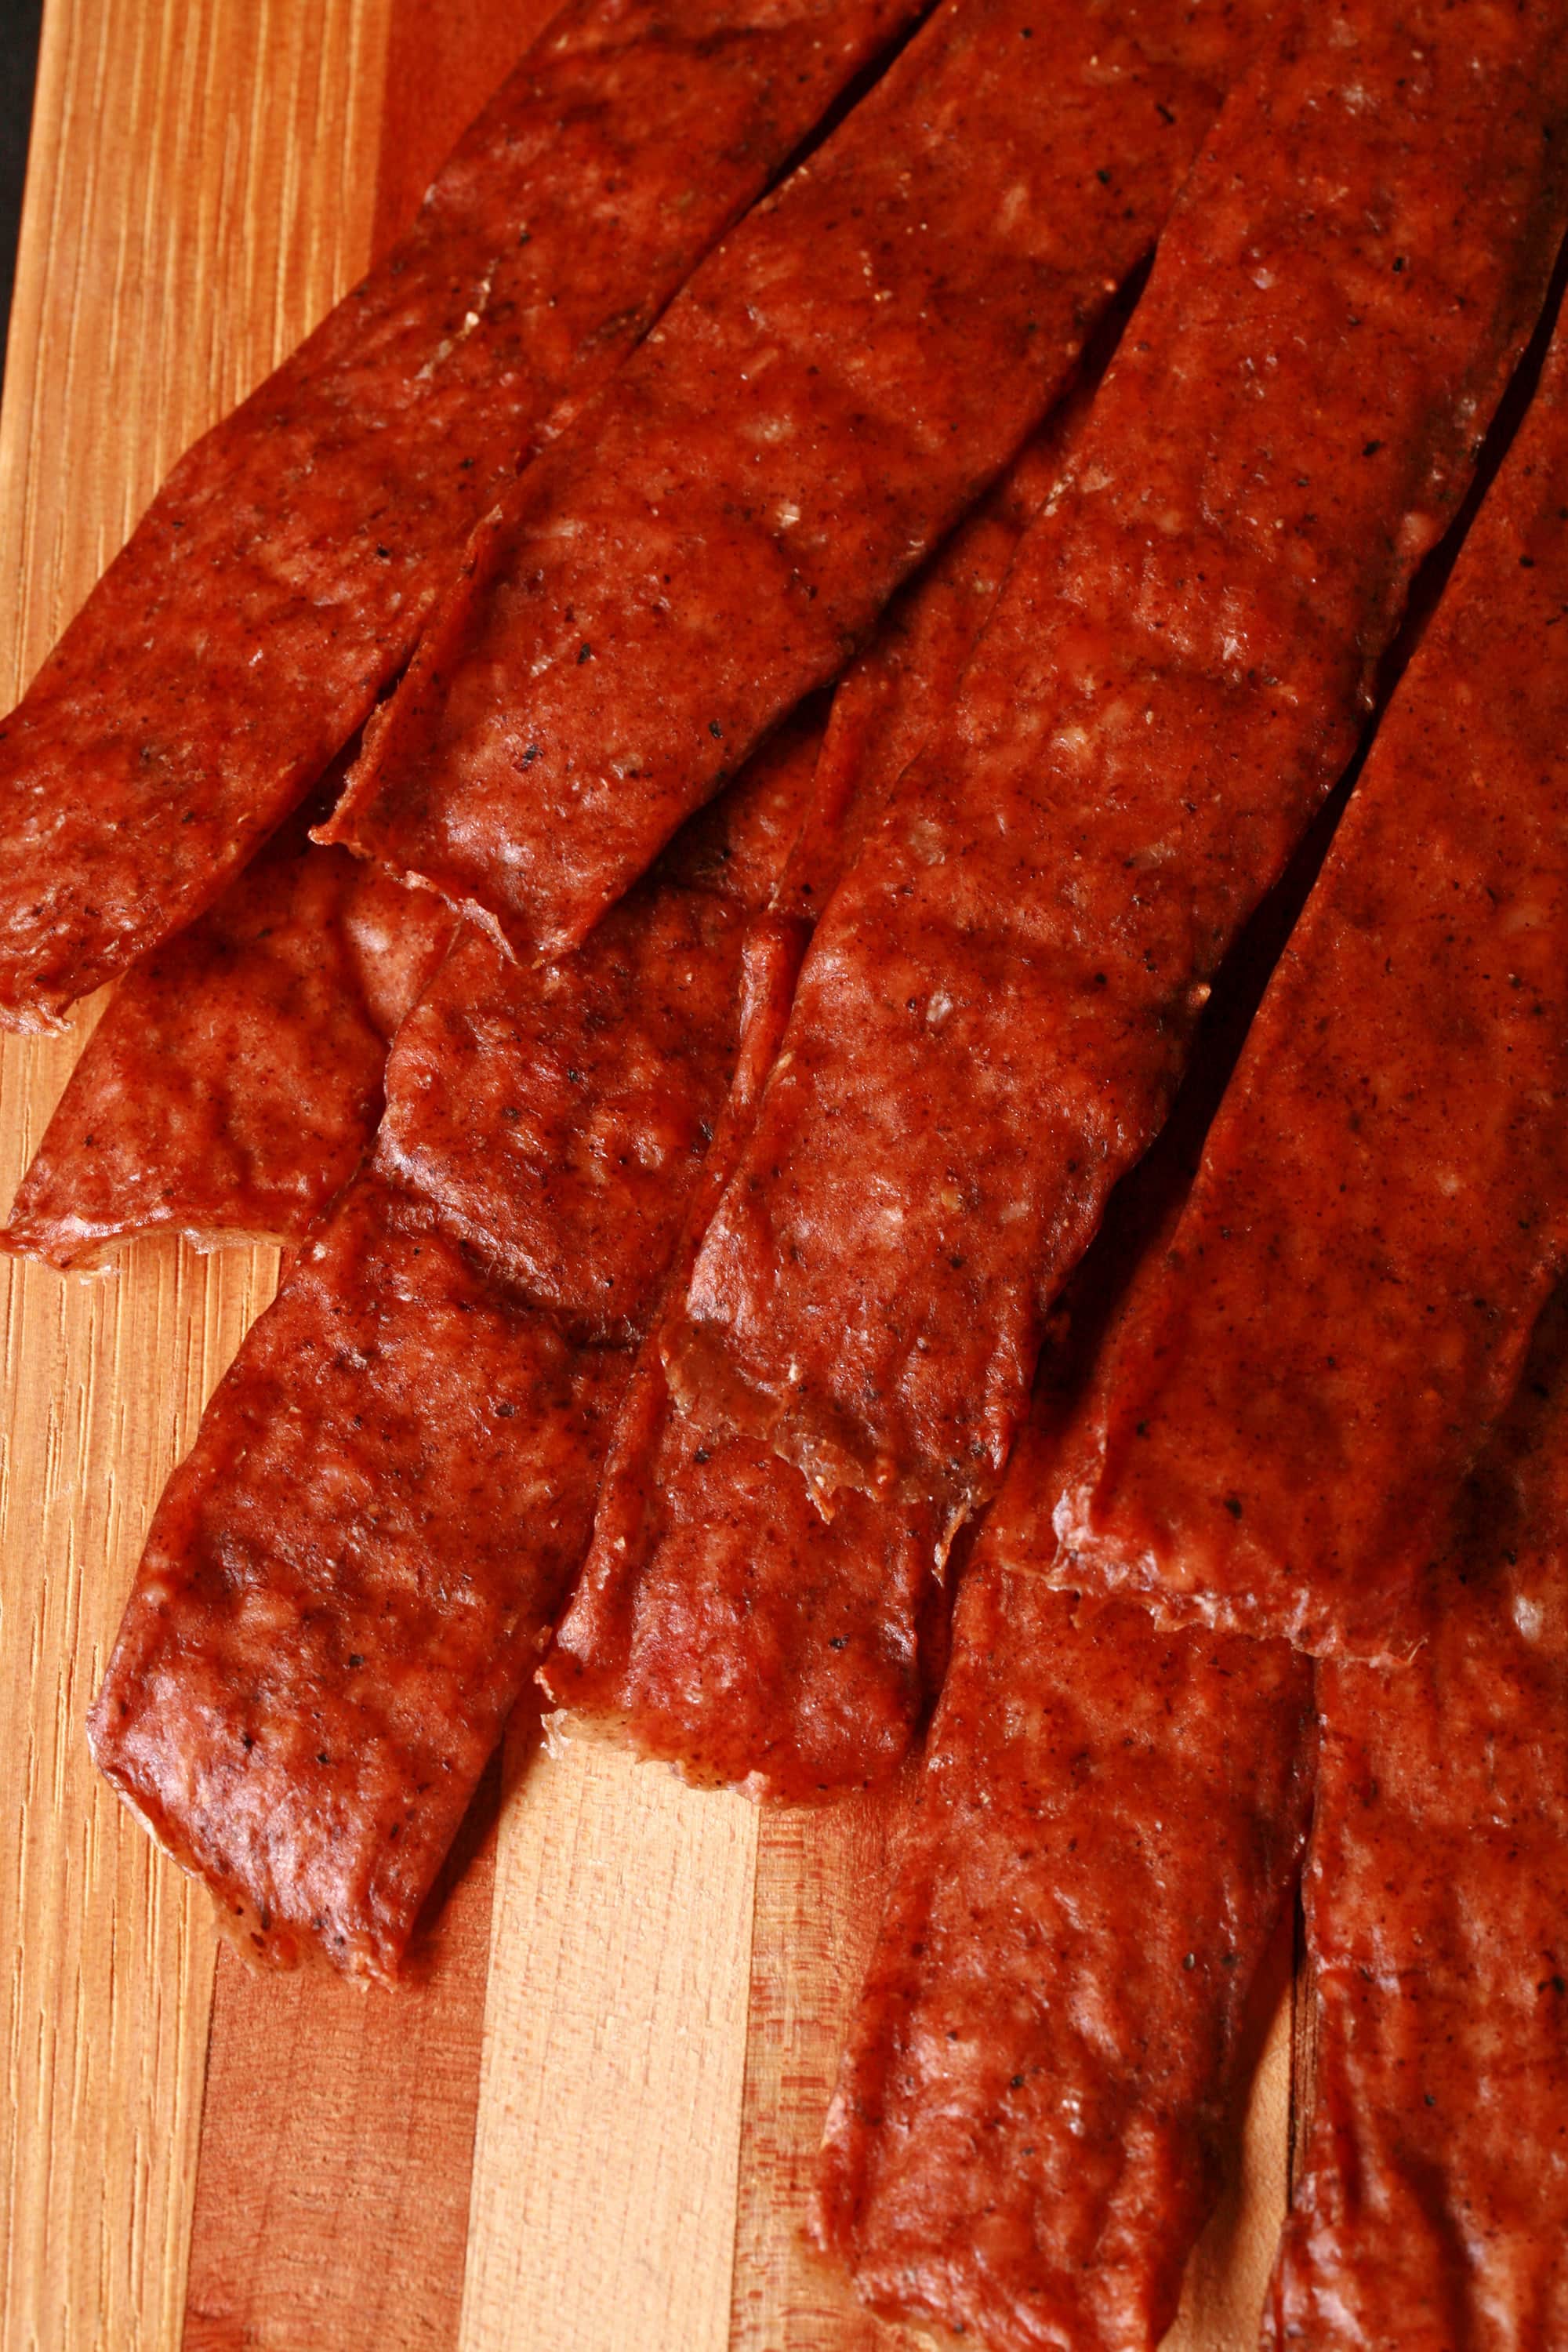
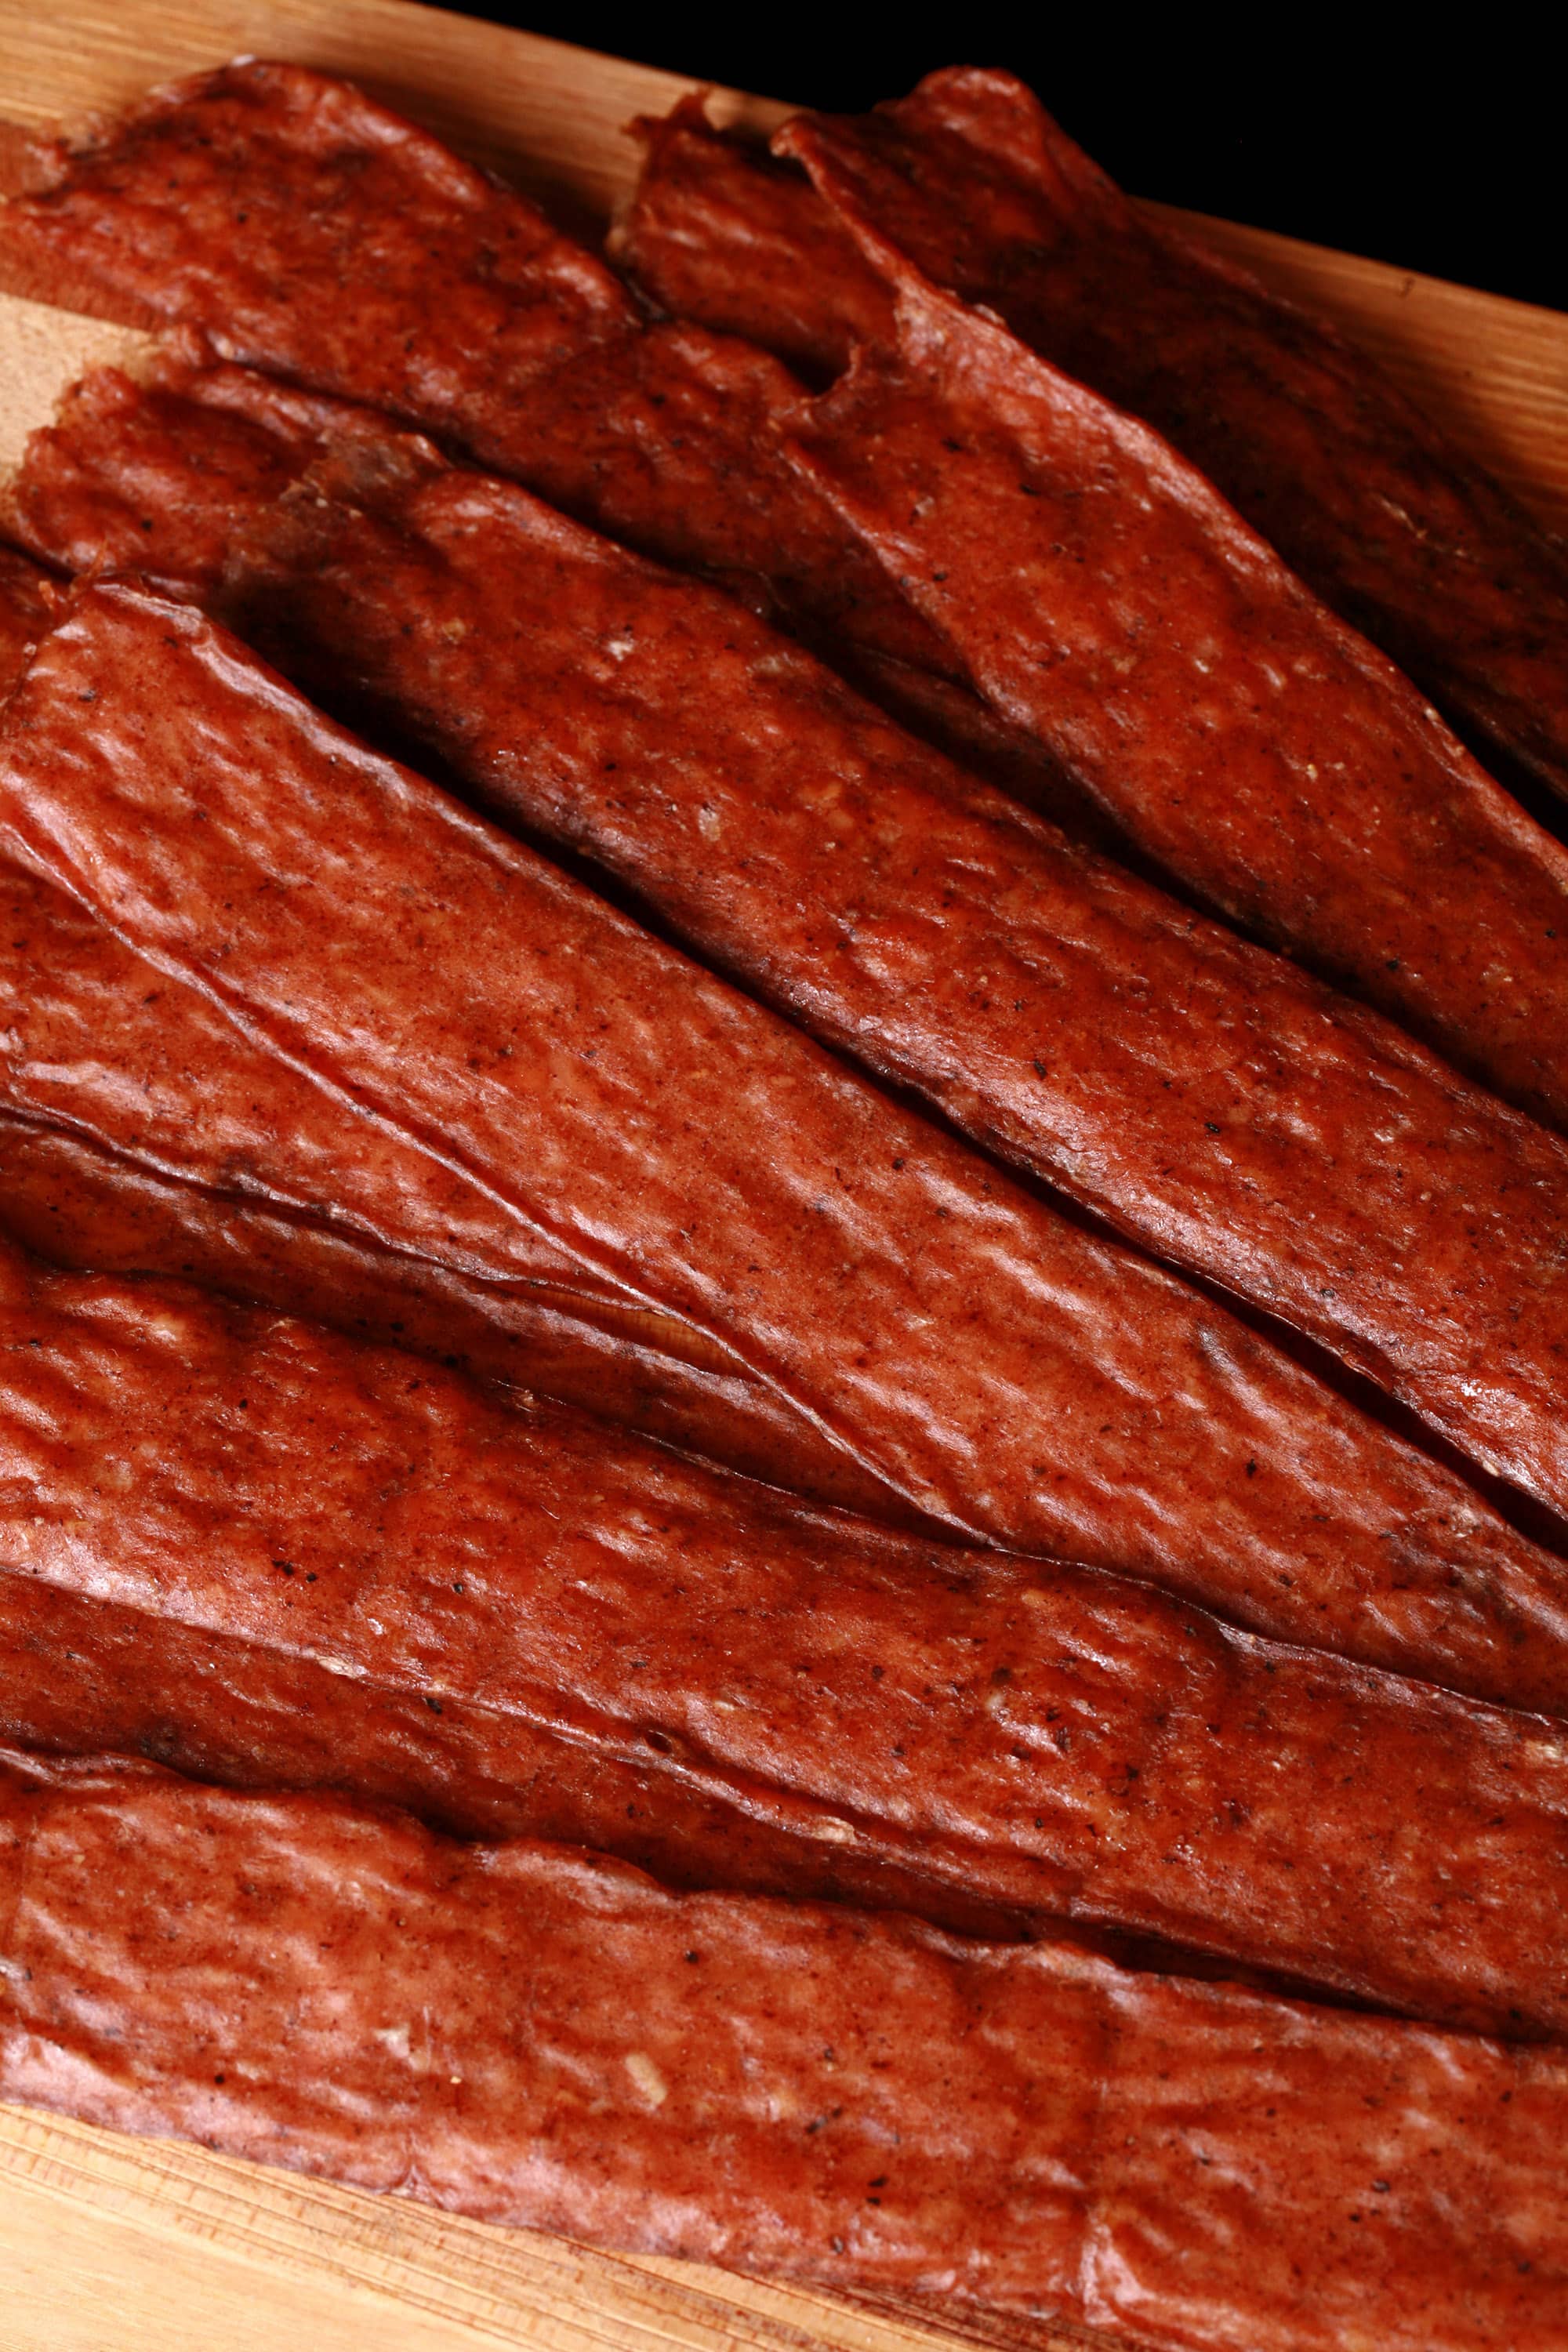
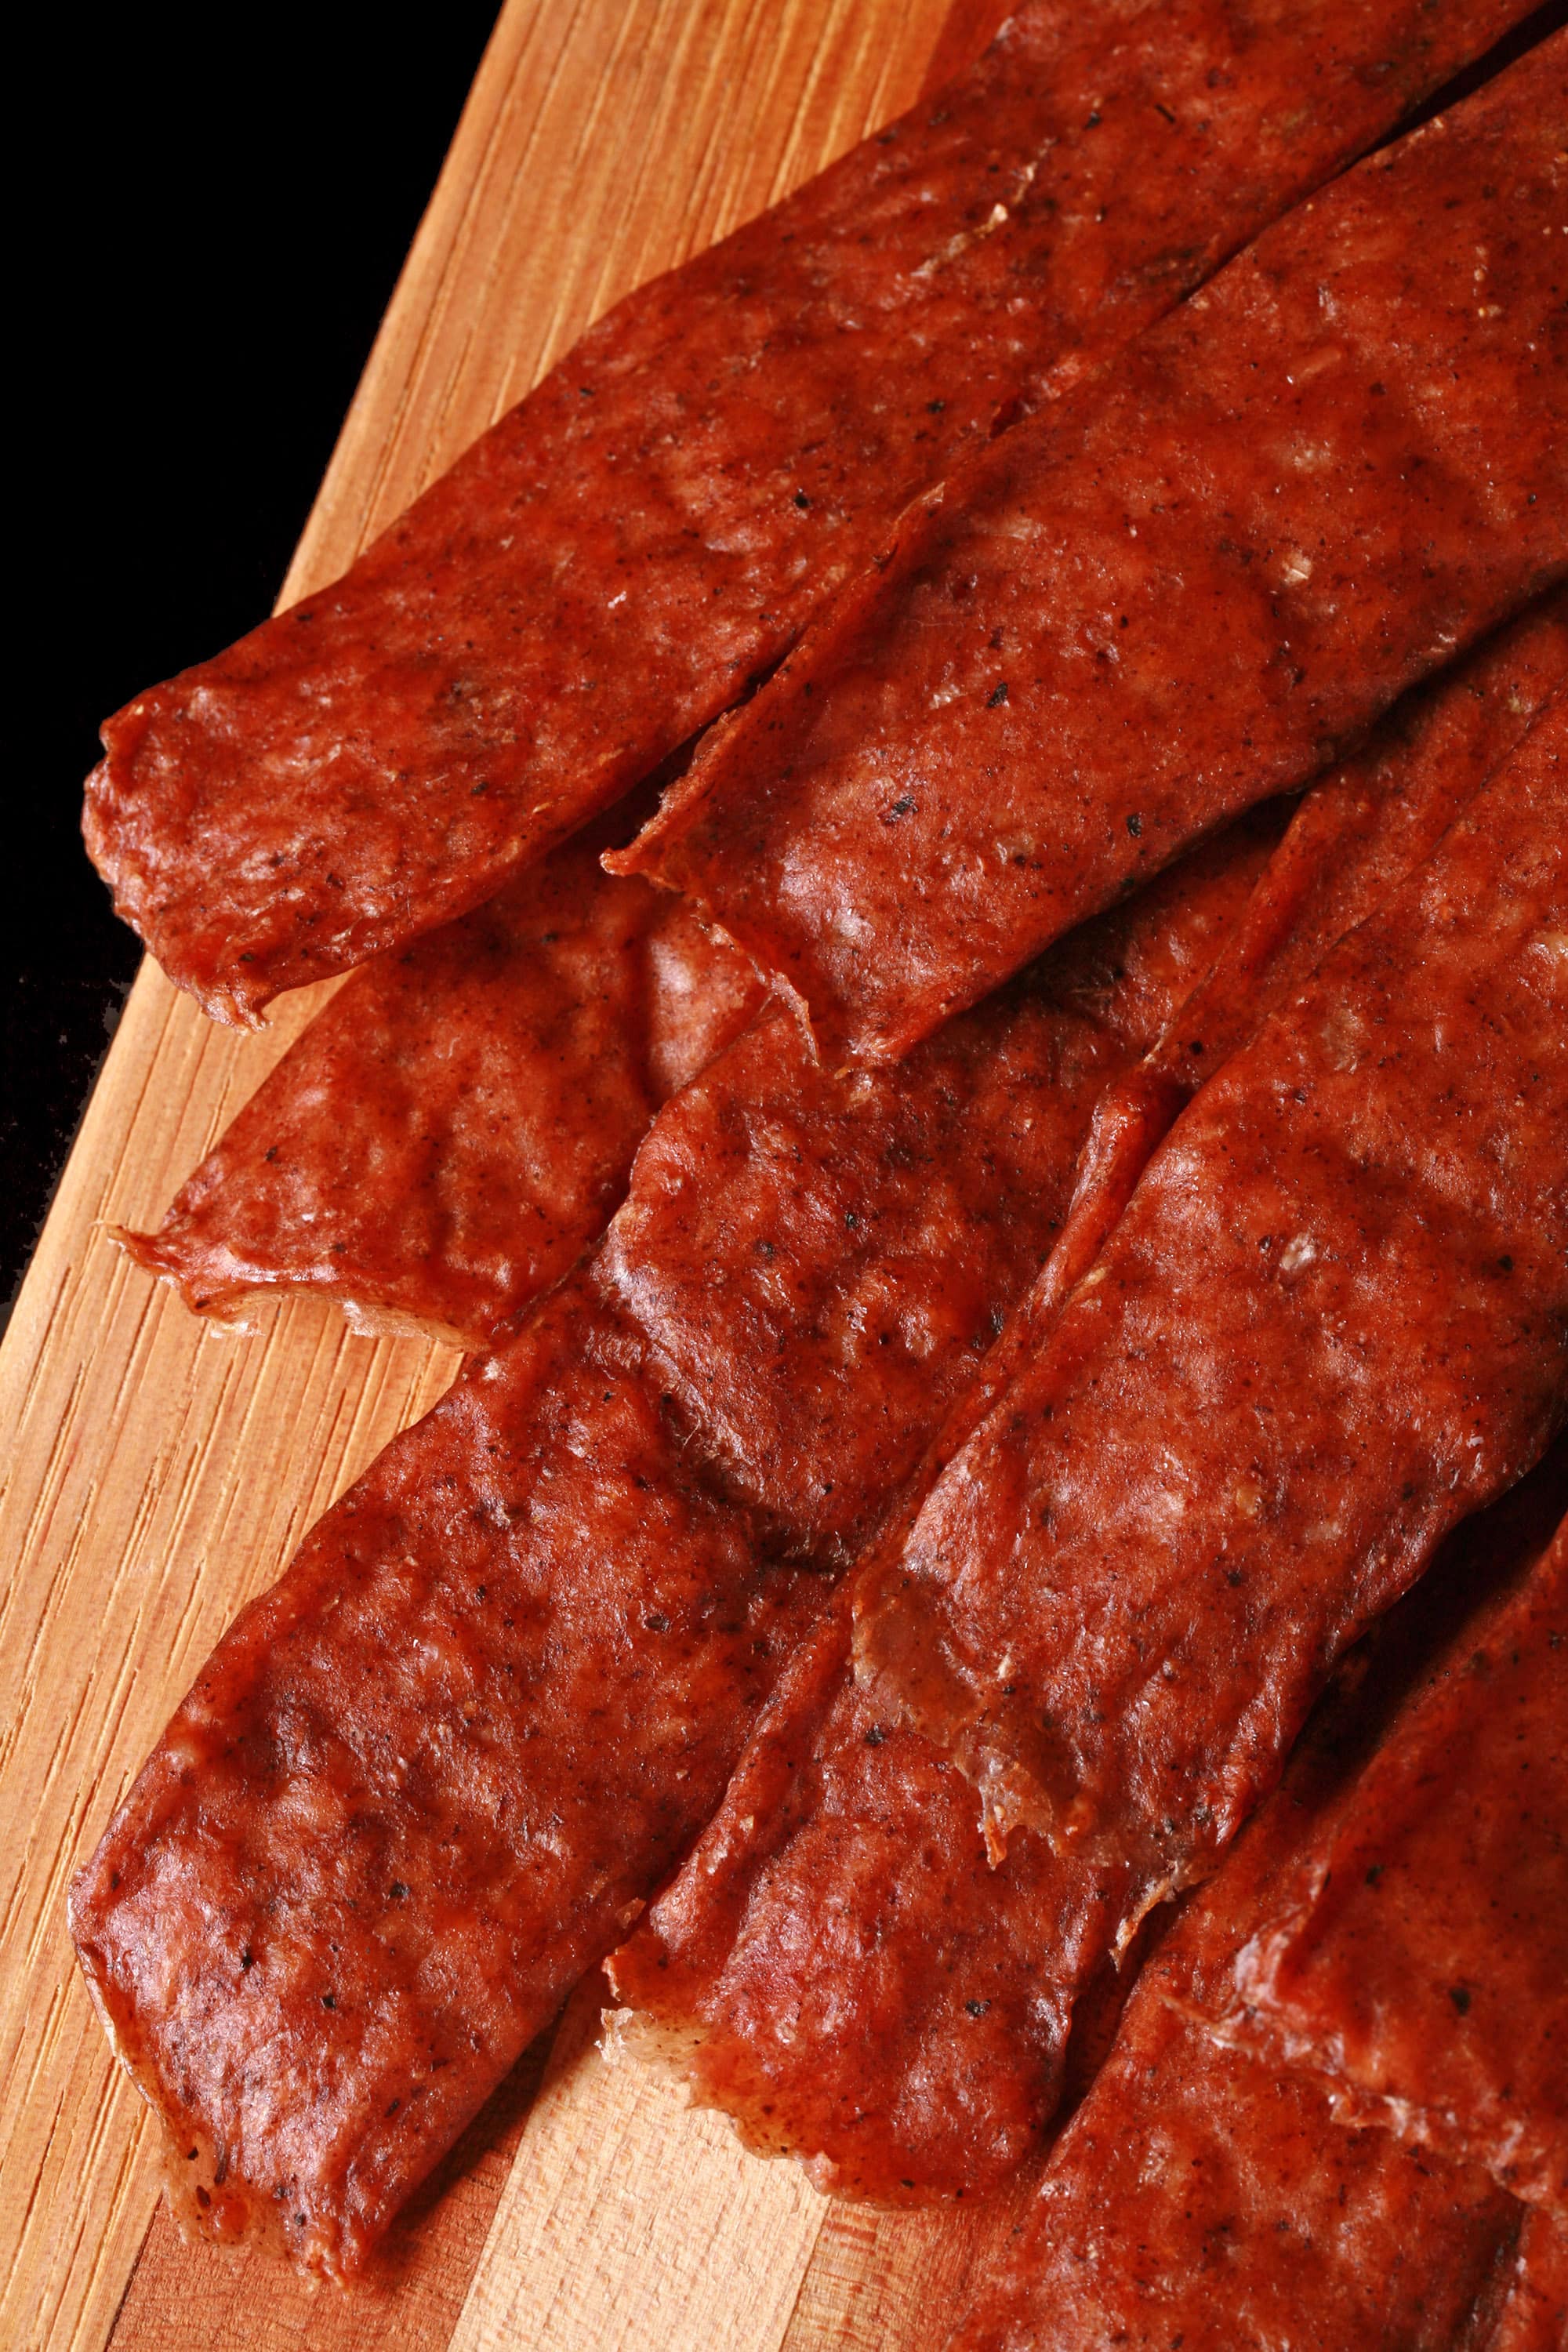
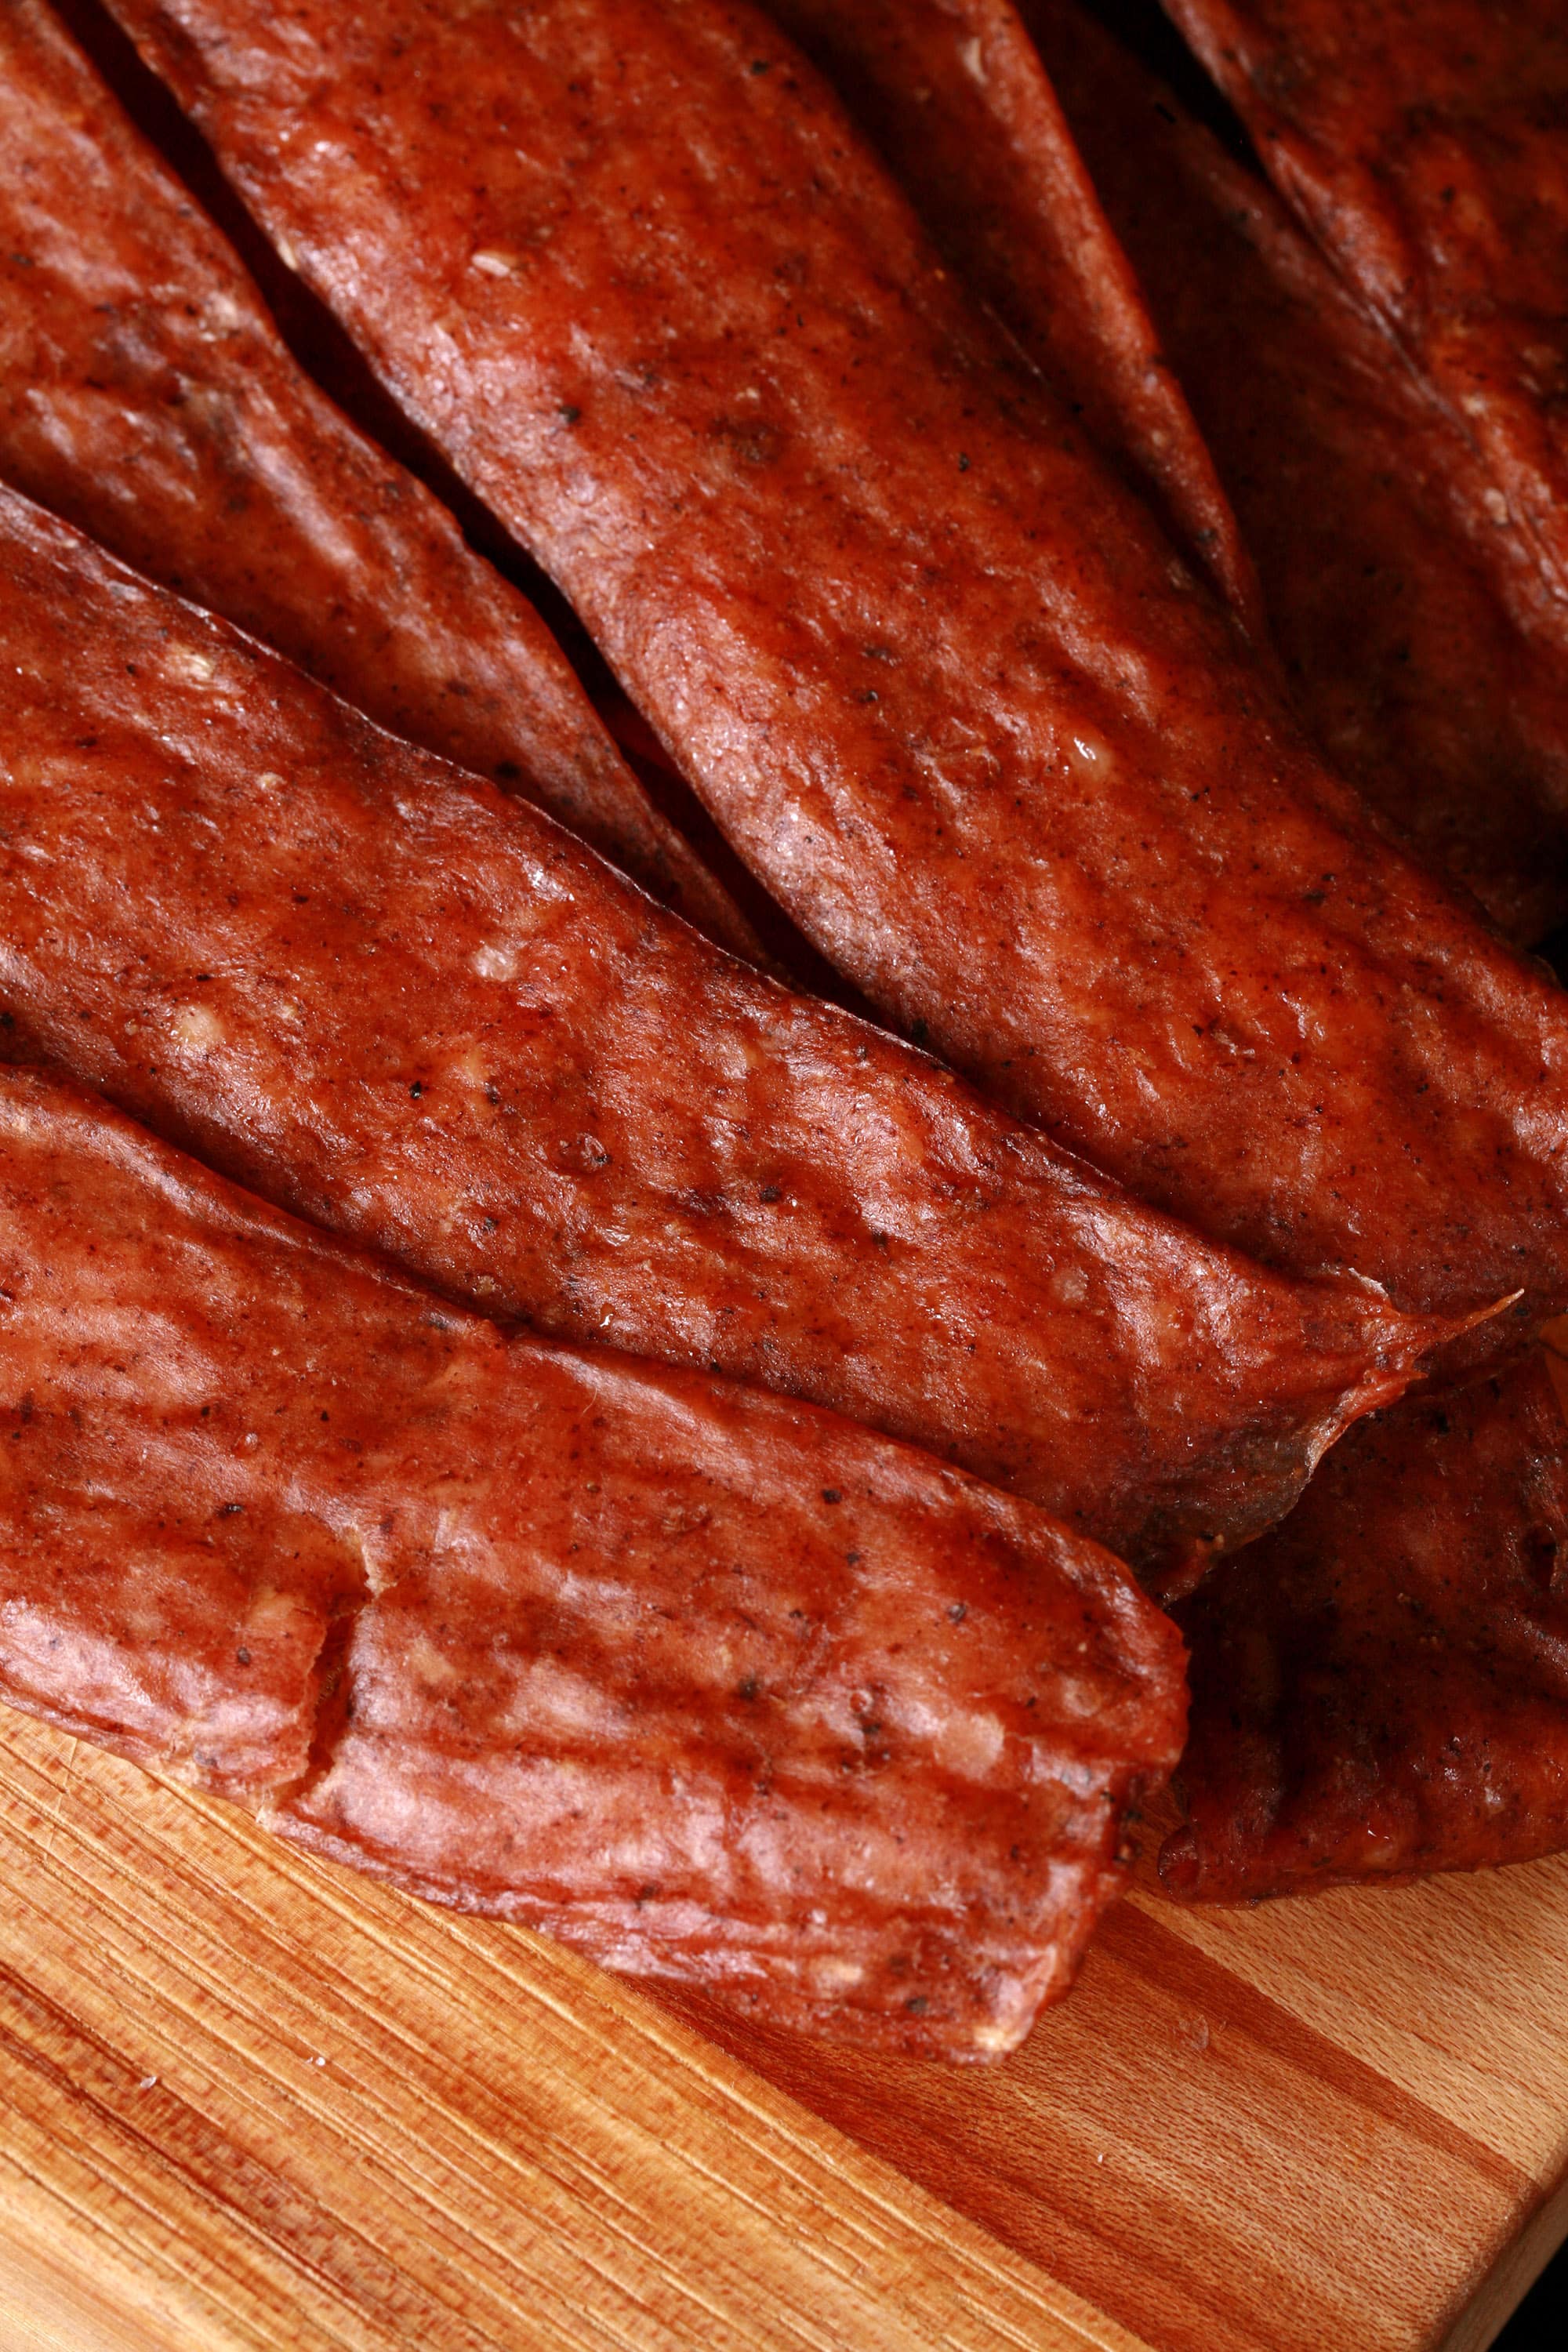
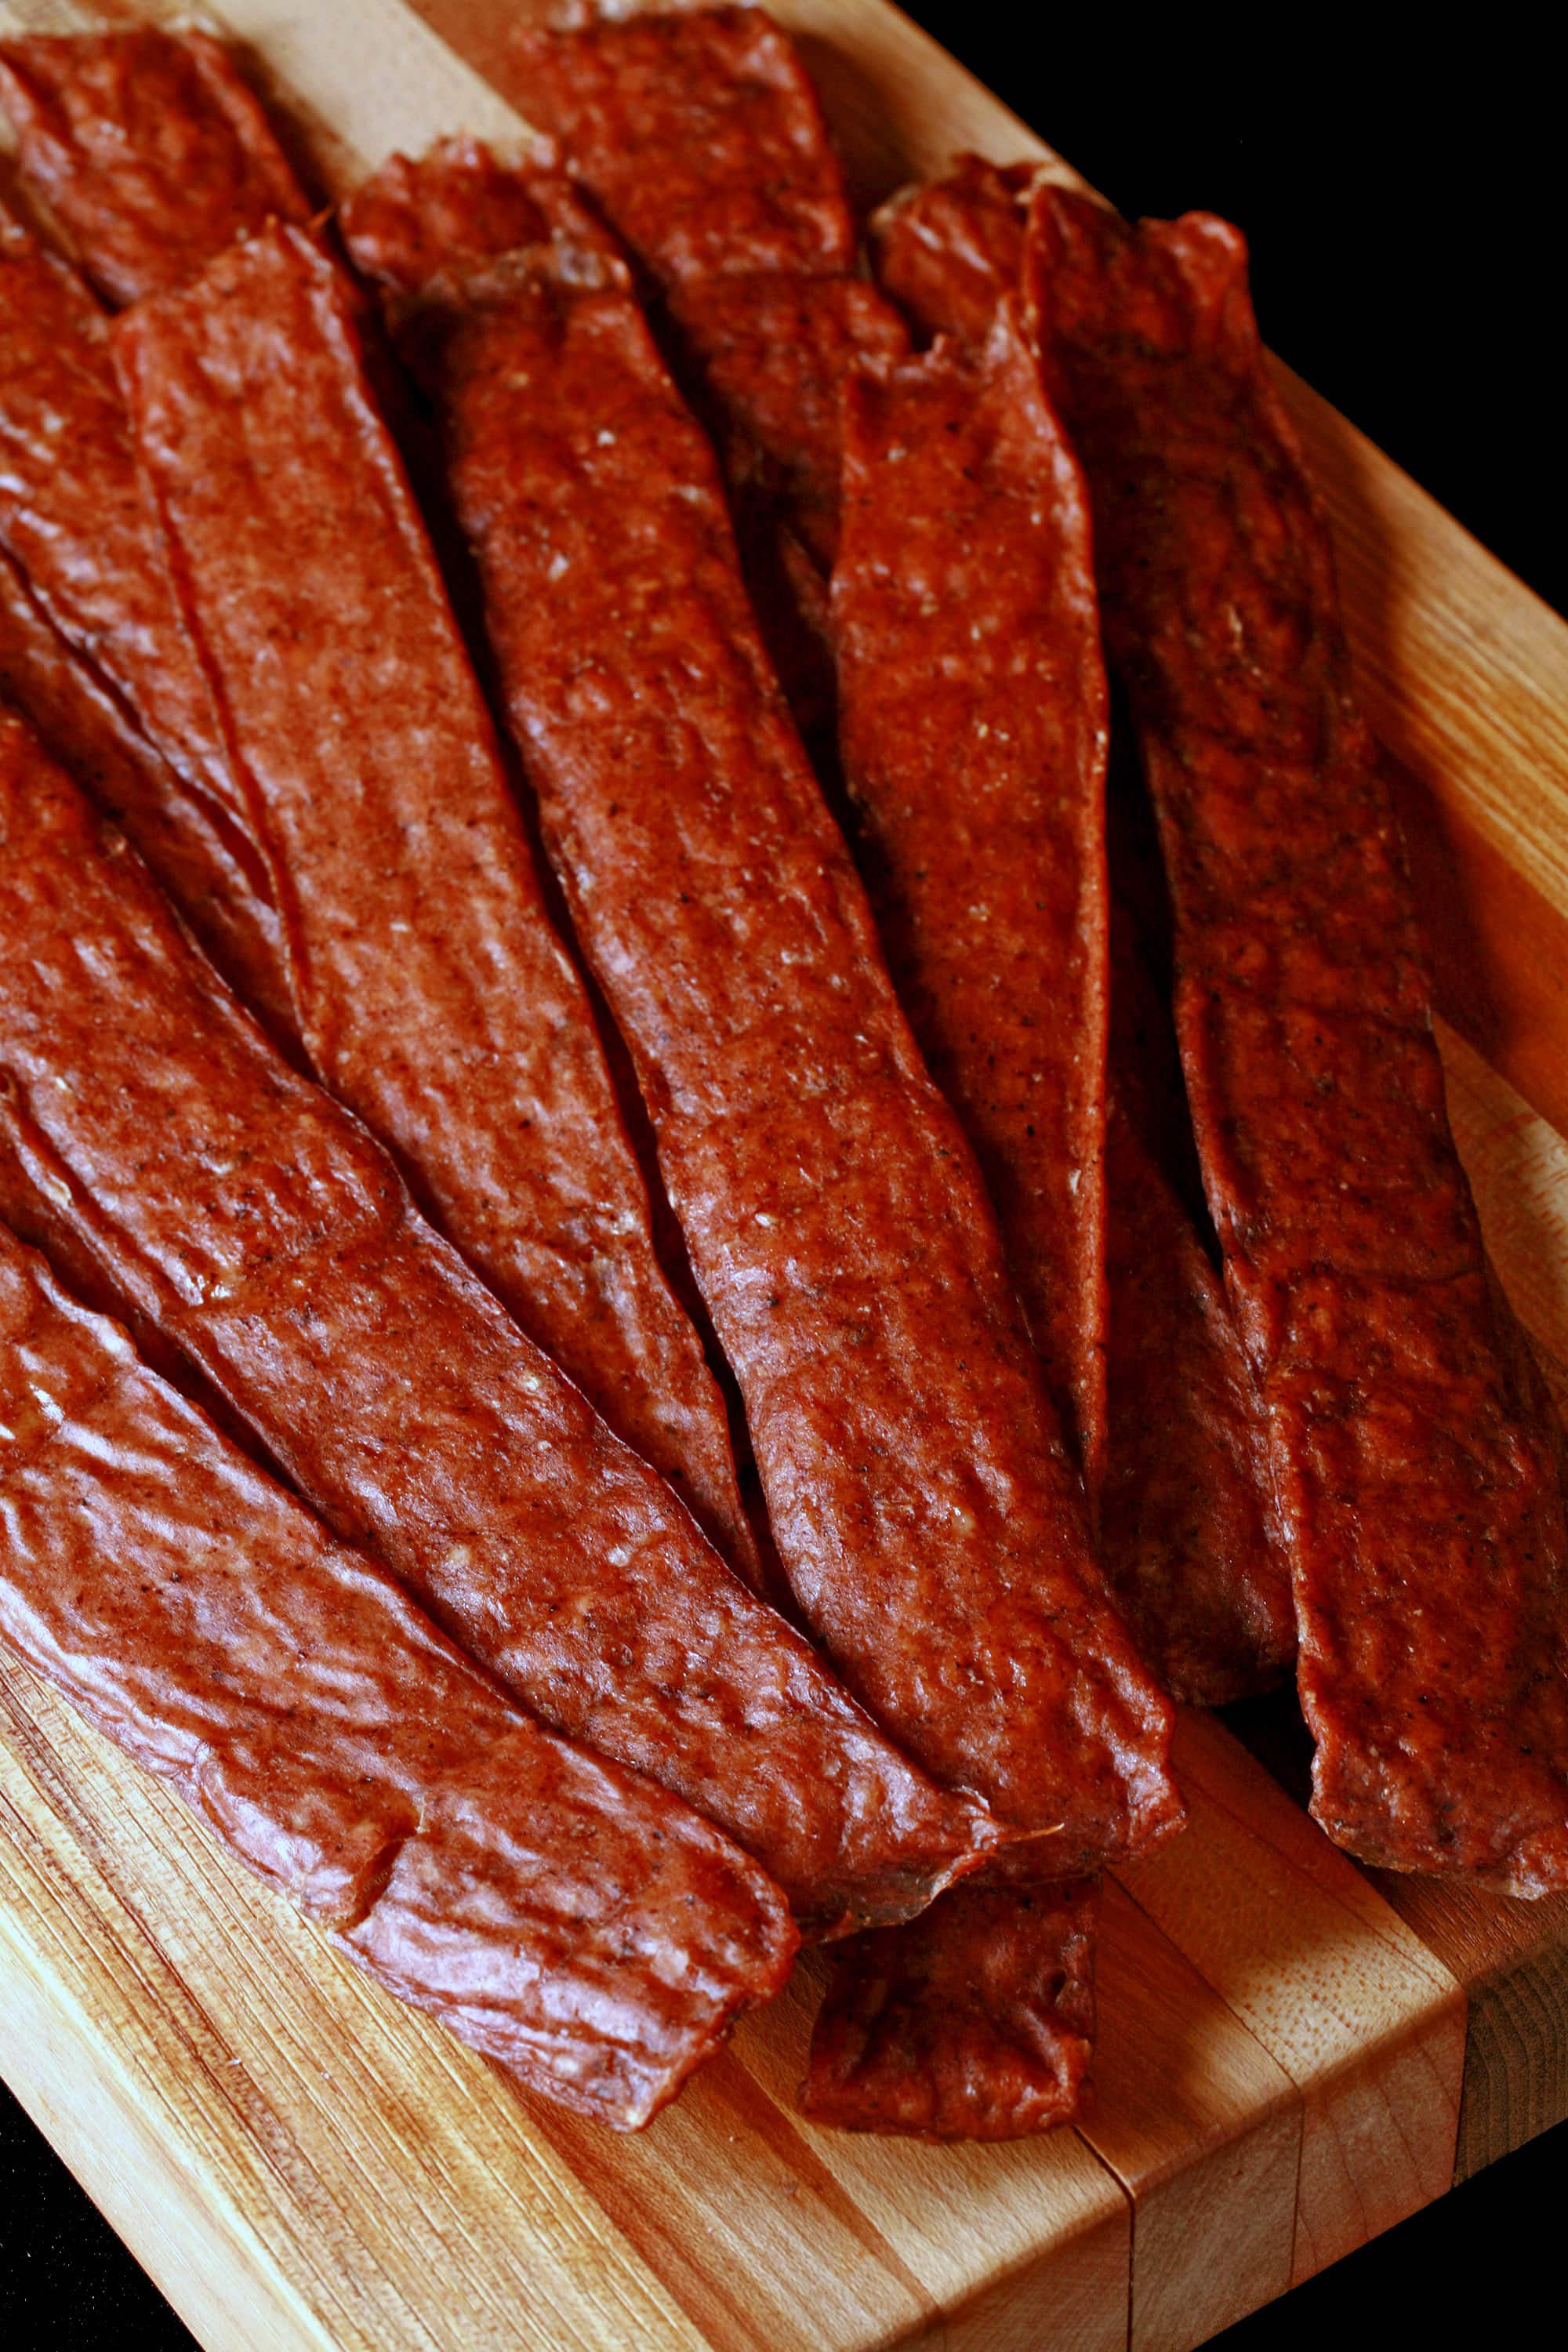
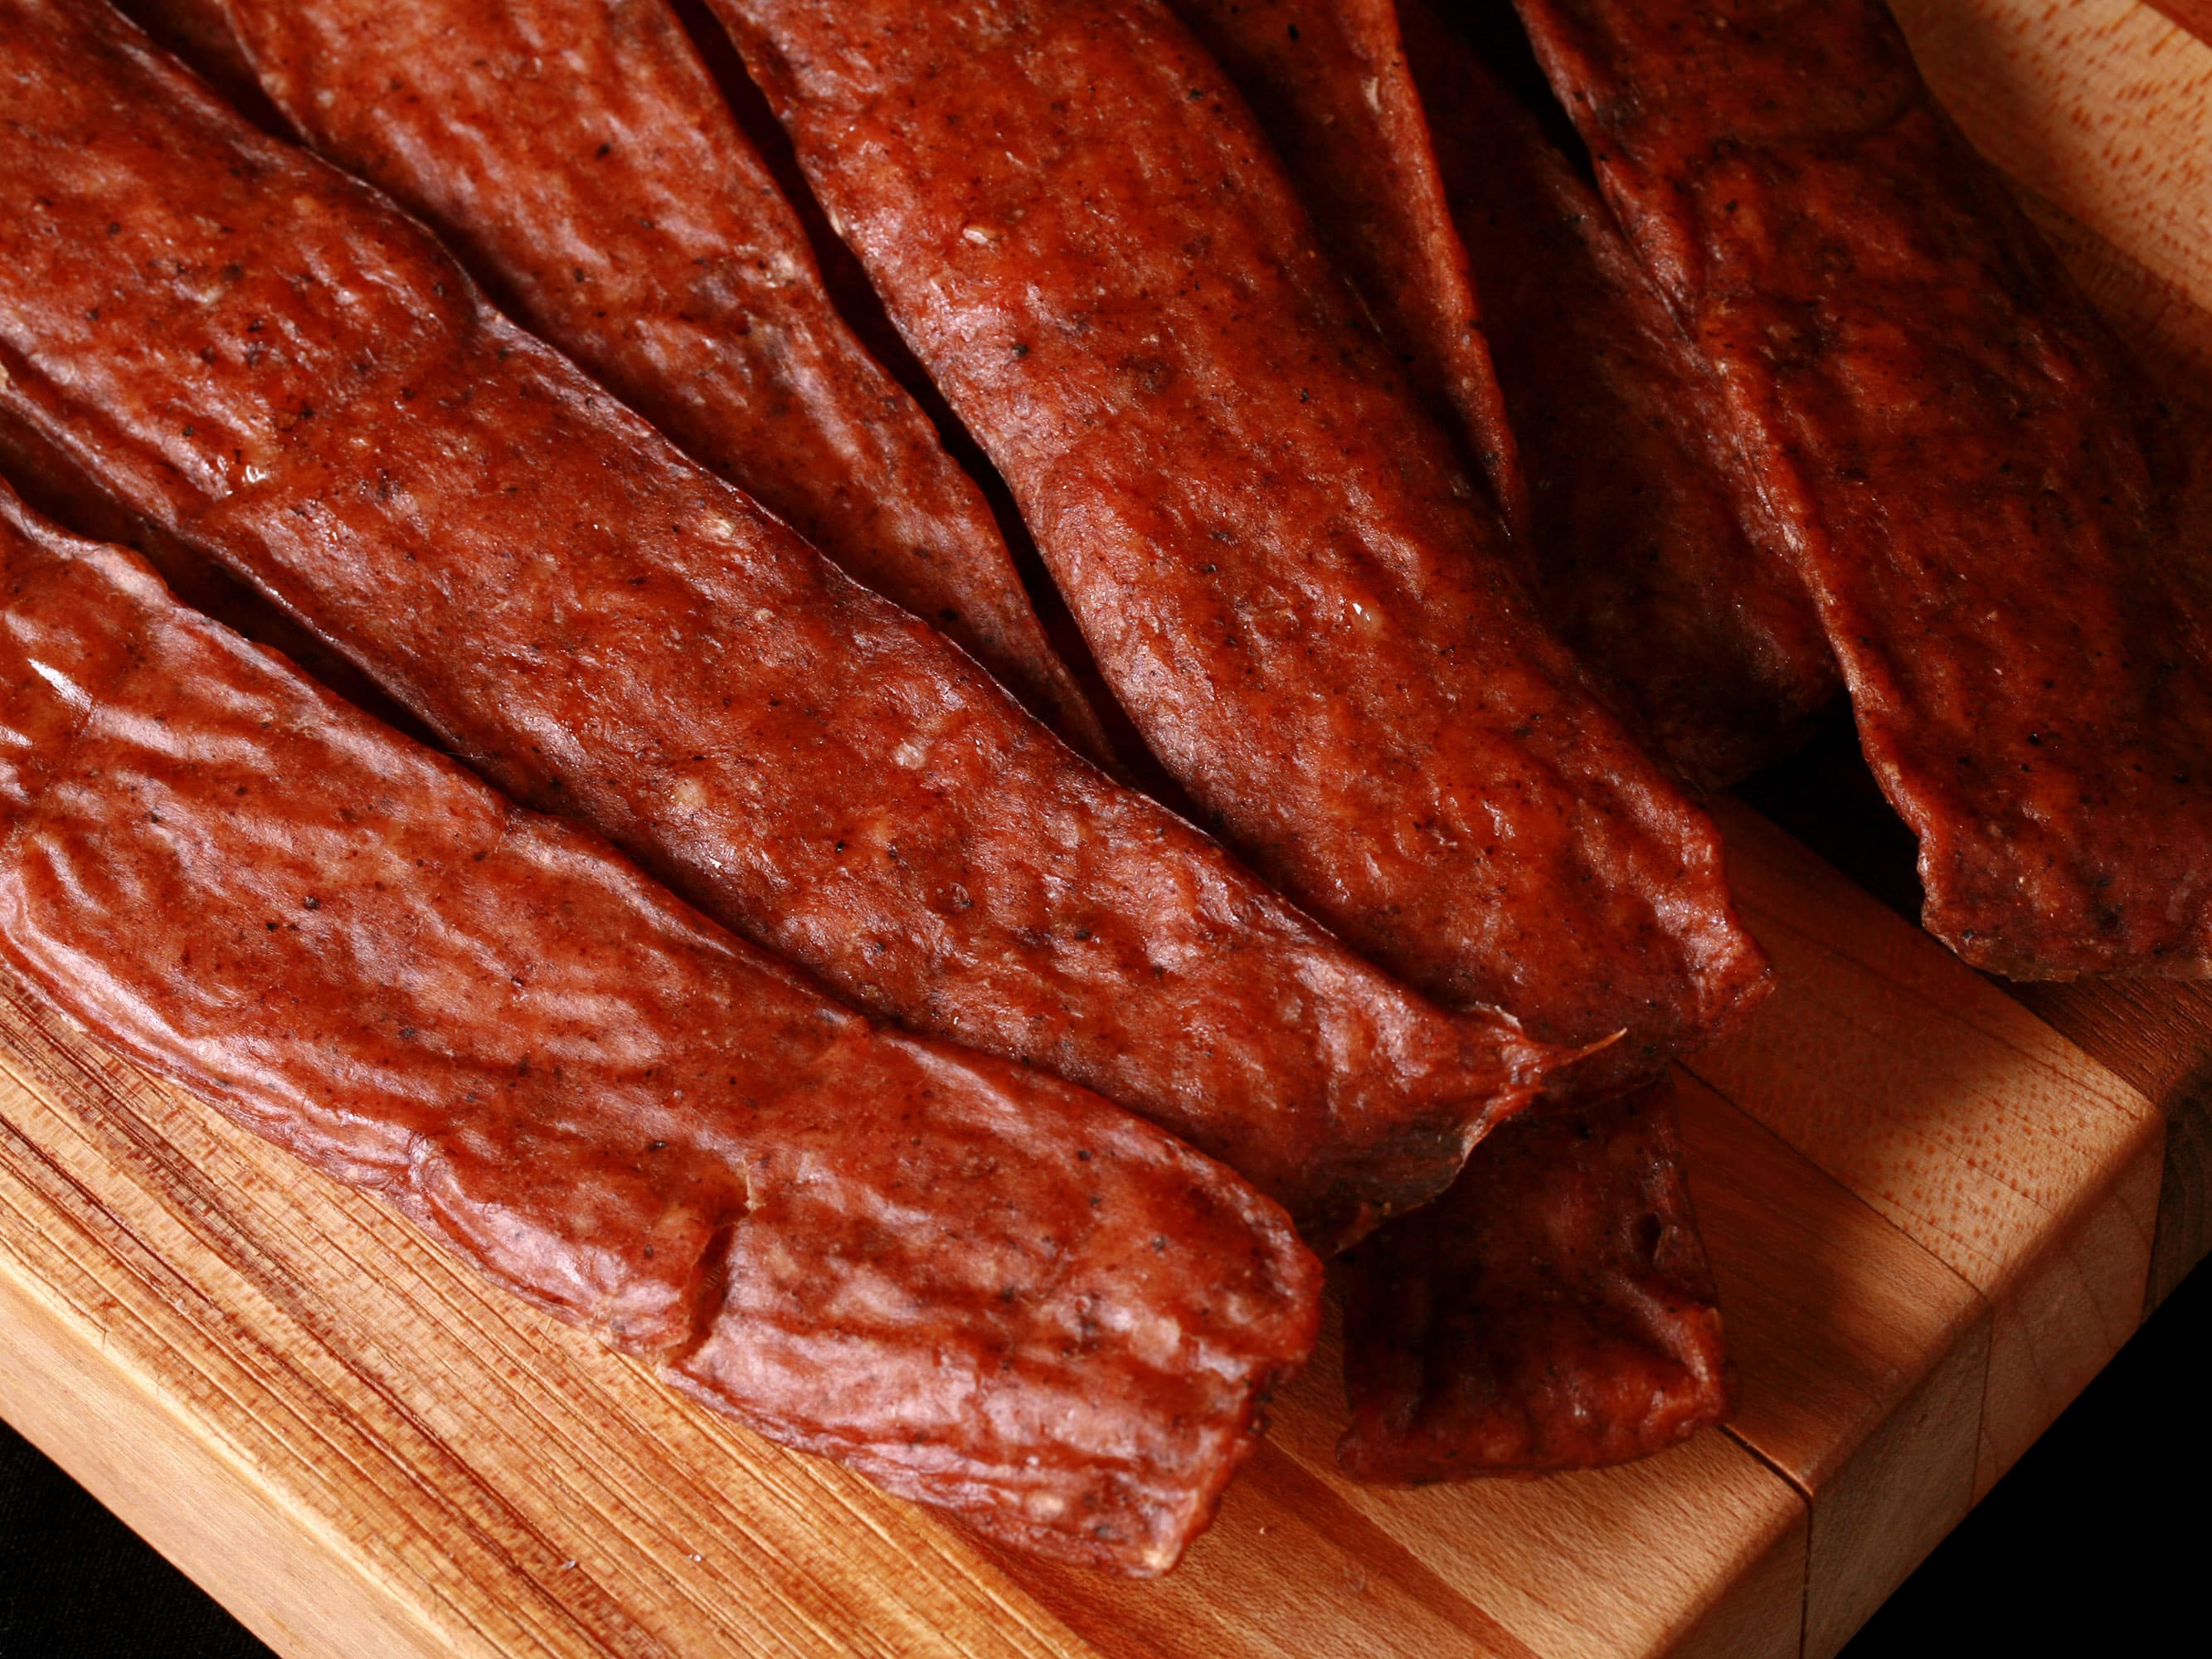
The Finished Jerky
Swedish Potato Sausage Chicken Jerky Storage
Allow jerky to cool COMPLETELY to room temperature before packaging.
This ground chicken jerky will keep at room temperature (in a cool dark place) for a week or so, or a few weeks in the fridge.
If sealed into an airtight container WITHOUT OXYGEN, it should be good for a month or so in a cool dark place, a couple months in the fridge, and 6 months or so in the freezer.
Once you open your vacuum sealed bag of chicken jerky, it should be eaten within a couple days - or a week, if put in the fridge after opening.
More Homemade Jerky Recipes
Are you someone who loves to bring jerky on road trips, hiking trails, and when camping? Me too! Here are some of my go-to recipes for homemade jerkies!
Basic Ground Beef Jerky
Blueberry Bison Jerky
Chipotle Chicken Jerky
Ginger Beef Jerky
Ground Venison Jerky
Homemade Salmon Jerky
Honey Garlic Chicken Jerky
Jalapeno Chicken Jerky
Jerk Chicken Jerky
Lingonberry Elk Jerky
Mango Habanero Chicken Jerky
Mushroom Jerky, 2 Ways
Pumpkin Spice Chicken Jerky
Rosemary & Blueberry Beef Jerky
Spicy Garlic Chicken Jerky
Sriracha Chicken Jerky
Tofu Jerky, 2 Ways
Pepperoni Jerky

Swedish Potato Sausage Jerky [Ground Chicken Jerky]
Equipment
- 1 Jerky Gun
- 1 Food Dehydrator
Ingredients
- ½ cup Finely Chopped Yellow Onion was ¼ lb
- 3 oz Crimini Mushrooms chopped
- ½ cup Plain Mashed Potatoes
- 1 ½ teaspoon Liquid Smoke
- 1 teaspoon Ground Black Pepper
- ¾ teaspoon Salt
- ½ teaspoon Allspice
- ¼ teaspoon Nutmeg
- ¼ teaspoon Prague Powder #1 Cure
- 1 lb Ground Chicken or Ground Pork If using pork, skip the mushrooms
Instructions
- Cut 2 or 3 squares of parchment paper slightly smaller than your dehydrator trays, set aside.
- In a small food processor, combine onions and mushrooms, blitz until very finely chopped. Add remaining ingredients - except for the chicken - and blitz until smooth.
- In a medium mixing bowl - using freshly washed or gloved hands - combine potato and onion mixture with the ground chicken. Mix it REALLY well - for best results, it’s better to overhandle it, than to under-mix it.
- Use a spoon to load the mixture into a jerky gun, taking care to avoid creating air bubbles.
- Line your dehydrator racks with the cut parchment paper, then pipe potato sausage jerky strips out onto them, leaving some space in between each.
- Dehydrate in a food dehydrator at 165 F for 2 hours.
- Once two hours has passed, remove the ground chicken jerky strips from the parchment, flip them over, and place them directly onto the wire rack.
- Return to the dehydrator and continue dehydrating at 165 F for another 2 - 3 hours. (Actual time will depend on the thickness of the potato sausage jerky strips.)
- To test for doneness, remove a piece of jerky from the dehydrator and let it cool to room temperature. It should feel dry to the touch and be able to bend to 90 degrees without breaking. (A bit of cracking or crackling is ok!)<
- Allow potato sausage jerky to cool COMPLETELY to room temperature before packaging.
Notes
Nutrition

Thanks for Reading!If you loved this post - or have any questions about it - please leave a comment below! We'd also love it if you would consider sharing the link on social media! |


Porters
A odd recipe in theory, but actually really tasty. Hope you love it as much as we do!