
This Homemade Mango Fruit Leather is the EASIEST homemade fruit roll ups recipe you'll ever see. You only need one ingredient, and about 5 minutes effort!

Making your own fruit leather is super easy in general, and the end result is WAY better than store bought fruit snacks, IMHO.
... and no homemade fruit leather recipe is easier than this one, for mango fruit roll-ups!
Because of the ingredient I use, you can basically pour it out and stick it straight in your dehydrator. 2 minutes of effort, and then you just have to wait for your tasty snack to dry out!
Even beyond the ease of making it, this recipe turns out a gorgeous fruit leather with the PERFECT texture.
It’s got a robust, bright mango flavour - just a really beautiful, tropical, relatively healthy snack - what’s not to love?
I recommend buying a few cans of the mango - your first batch of this mango fruit leather is likely to disappear VERY quickly! Highly addictive stuff, if you’re a mango lover.
Anyway, let’s look at what you’ll need for your own mango fruit leather.

Ingredients
This easy fruit leather recipe uses only 1 mandatory ingredient, with 2 optional ingredient possibilities.
Here’s what you’ll nee to know:
Mango Pulp
I use canned Mango Pulp for this mango leather recipe - it’s a combination of mango, sugar, and citric acid.
I love the stuff, and use it in things like my Mango Curd, Mango Panna Cotta, Mango Lassi Popsicles, Mango Ice Cream, Strawberry Mango Marble Cake, Mango Wine, Mango Strawberry Wine, and my famous Mango Mojito Upside Down Cake.
You can usually find it in the international section at grocery stores, or at any Indian grocer.
The added sugar and citric acid means no needing to measure ingredients, for starters.
The canned pulp is available year-round, and is consistent. No need to work around mango season, or finding perfectly ripe mangoes to make a fruit puree.
There can be a huge difference in the flavour, texture, sweetness and size of fresh mangos, so “1 can = 3 trays” is super consistent and easy.
Also, no need to use a food processor in making your own mango puree.
Finally, it just tends to provide an even better fresh mango flavour than fresh mangoes!
Flavour, ease, and consistency make it a definite win, in my books.

Salt, Optional
If you’re someone who likes your candy salty, add a bit to your mango pulp!
Just be careful about it - the salt flavour will become more concentrated as the fruit dries.
Citric Acid, Optional
Adding a bit more citric acid can do anything from brighten the flavour a bit, to giving you a “sour mango” fruit roll up.
If you’re a fan of sour candies - which are usually coated in a mix of sugar and citric acid - it can be a fun option to play with.
As with the salt, start out with less than you think you need, as the flavours will concentrate as the fruit leather dries.
Note: You can use a splash of lime juice for a bit of brightness, but I wouldn’t recommend adding enough to make a SOUR fruit puree, or you could run into texture issues with the finished product.

Equipment
There are two specialized pieces of equipment that I use for making fruit leathers, beyond basics like spoons, bowls, and measuring cups:
A Food Dehydrator
While you can apparently make homemade mango fruit leather in a regular conventional oven, I’m not a fan of running one for hours on end.
I’ve had food dehydrators before - the basic kinds with no time or temperature controls, and I didn’t really use them much.
When I got into making jerkies, though, I upgraded to a Cosori 6 Tray Food Dehydrator last year, and LOVE it.
It was only like $200 Canadian, and it’s paid for itself MANY times over, between all the Maple Cinnamon Apple Chips and jerkies I’ve been making!
Think of it this way - The same size of jerky that I tend to make goes for about $4 in a gas station.
I get about 10-15 strips out of a batch (varying by recipe) - let’s average that out to 12. That’s $48 worth of jerky, for $8 or less. Make 5 batches, that’s your $200 in savings!
Anyway, we’re using a dehydrator a LOT more, now that we have a nice one. Having the more control over the drying process really opens up the possibilities.
Silicone Dehydrator Trays
You’ll need a couple Silicone Dehydrator Trays, with a bit of a rim, for making you own fruit leather.
The fruit leather trays you’ll buy will depend on the size of your dehydrator.
For our dehydrator, we use these Silicone Dehydrator Mats Compatible with Cosori CP267-FD.

Share the Love!If you’ve made one of our recipes, be sure to take some pics of your handiwork! If you post it to Bluesky, be sure to tag us - @CelebrationGen. We're also on Pinterest, so you can save all your favourite recipes to a board! Also, be sure to subscribe to our free email newsletter, so you never miss out on any of our nonsense. Well, the published nonsense, anyway! |
How to Make Easy Mango Fruit Leather
The full recipe is in the printable recipe card at the end of this post, here is the visual walk-through:
Flavour the Mango, Optional:
If flavouring your fruit leather, dump the can of mango pulp into a medium mixing bowl.
If you want a salty mango fruit leather, add a little salt to taste.
For a sour mango fruit leather, add a little citric acid to taste.
In either case, mix it really well and go a bit easy on the amount you use - remember, the saltiness/sourness of the fruit mixture will concentrate as the mango dries.
Make your Mango Fruit Leather:
Divide your mango pulp - either straight from the can, or after seasoning - between silicone dehydrator trays. Ours are about 11 x 10", and we used 3, perfectly.
Use an offset spatula to spread the mixture to an even thickness on each tray.

At 6 hours, check your mango fruit leather. It should pull up from the silicone relatively easily, and be soft without being sticky. If it’s not dried yet, put it back in the food dehydrator until it is.
Drying time will vary based on how thick you spread it - it’ll usually be 6-8 hours.

Before and After 6 hours of Drying.
Once you’re happy with the dryness, remove the pans from the food dehydrator and allow to cool to room temperature.

Use a pizza wheel or sharp knife to cut the mango fruit leather into strips, then store in an airtight container - see notes on how to condition it, for longer storage.

Condition the Mango Fruit Leather:
Keep an eye on the fruit leather for the first 3 days or so.
If you see any evidence of residual moisture in that time frame - droplets on the bag, etc - return the mango leather to the dehydrator and let it dry a bit more.
If at any point you see any evidence of mold, throw the batch out.

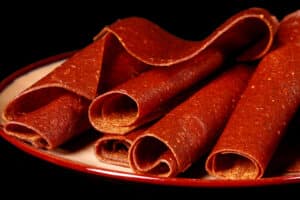
We like to stick each one to a square of parchment and roll them up.

Other Dried Fruit Recipes
Looking for fruit leather and other dried fruit recipes? Here are a few to get started:
Bananas Foster Banana Chips
Bananas Foster Fruit Leather
Caramel Apple Fruit Leather
Cardamom Pear Chips
Maple Cinnamon Apple Chips
Pumpkin Spice Chicken Jerky
Strawberry Banana Fruit Leather


Mango Fruit Leather [Homemade Mango Fruit Roll-Ups!]
Equipment
- Food Dehydrator
- Rimmed Silicone Dehydrator Trays
Ingredients
- 1 can Mango Pulp 850 grams, See post for full details
- Salt Optional
- Citric Acid Optional
Instructions
Flavour the Mango, Optional:
- If flavouring your fruit leather, dump the can of mango pulp into a medium mixing bowl.
- If you want a salty mango fruit leather, add a little salt to taste. For a sour mango fruit leather, add a little citric acid to taste. In either case, mix it really well and go a bit easy on the amount you use - remember, the saltiness/sourness will concentrate as the mango dries.
Make your Mango Fruit Leather:
- Divide your mango pulp - either straight from the can, or after seasoning - between silicone dehydrator trays. Ours are about 11 x 10", and we used 3, perfectly.
- Use an offset spatula to spread the mixture to an even thickness on each tray.
- Dehydrate at 135 F for 6 hours.
- At 6 hours, check your mango fruit leather. It should pull up from the silicone relatively easily, and be soft without being sticky. If it’s not dried yet, put it back in the food dehydrator until it is.
- Once you’re happy with the dryness, remove the pans from the food dehydrator and allow to cool to room temperature.
- Use a pizza wheel or sharp knife to cut the mango fruit leather into strips, then store in an airtight container - see notes on how to condition it.
Notes
Nutrition

Thanks for Reading!If you loved this post - or have any questions about it - please leave a comment below! We'd also love it if you would consider sharing the link on social media! |


Porters
One of our favourite fruit leather recipes to date! We hope you love it as much as we do!